Sticky Coconut Cake Recipe – Decadent Tropical Treat
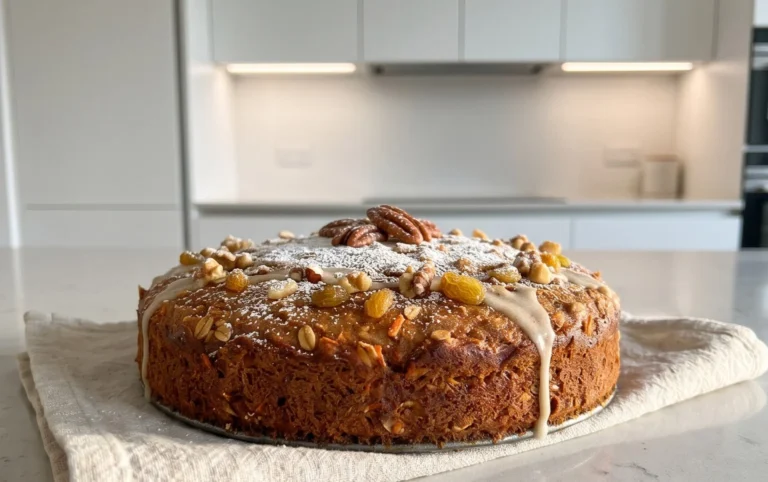
Sticky Coconut Cake is more than just a dessert; it’s a tropical escape baked right in your own kitchen. Imagin extracte the aroma of toasted coconut mingling with warm spices, promising pure bliss with every single bite. This isn’t your average cake. What makes this Sticky Coconut Cake so utterly irresistible is its delightful paradox: a tender, moist crum extractb enrobed in a luscious, glistening caramel glaze that truly lives up to its name. It’s the perfect balance of sweet, nutty, and wonderfully gooey. I love this cake because it transports me straight to a sun-drenched beach with its vibrant coconut flavour and comforting texture. It’s the kind of treat that makes any occasion feel a little more special, or simply elevates an ordinary afternoon into something extraordinary.
Why You’ll Fall in Love
The Ultimate Comfort Dessert
Sticky Coconut Cake
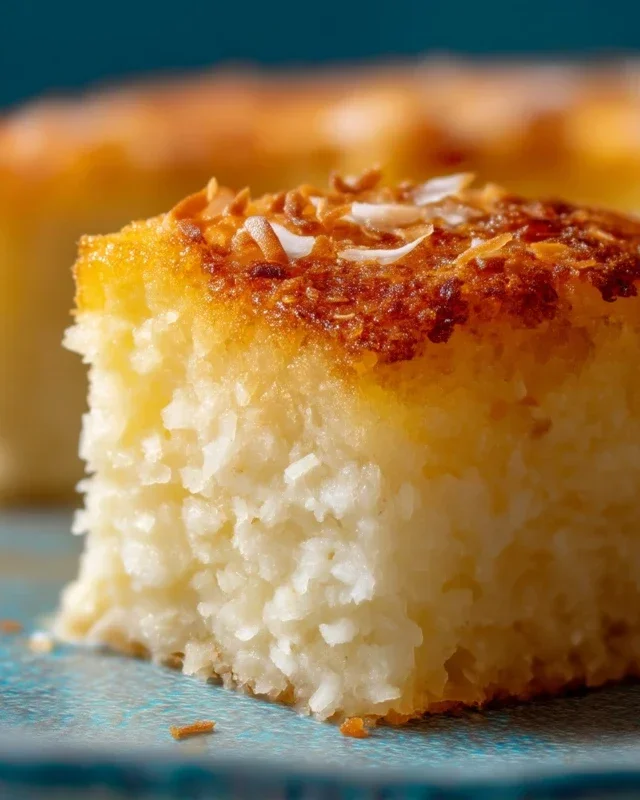
This Sticky Coconut Cake is an absolute delight, a tropical escape in every bite. It’s wonderfully moist, infused with the rich aroma of coconut, and possesses a delightfully chewy texture that’s utterly addictive. It’s surprisingly simple to make, perfect for both begin extractners and experienced bakers looking for something a little different. The magic lies in the combination of glutinous rice flour and coconut milk, which create that signature sticky, tender crum extractb. I love serving this cake warm, perhaps with a dollop of whipped cream or even a scoop of coconut ice cream for an extra indulgence. It’s a fantastic treat for any occasion, from a casual afternoon tea to a celebratory gathering. Get ready to transport your taste buds to a tropical paradise with this incredible recipe!
Ingredients:
Preparing Your Ingredients
Before we dive into the mixing and baking, it’s essential to have all your ingredients measured and ready to go. This makes the process smooth and enjoyable. Make sure your eggs are at room temperature; this helps them emulsify better with other ingredients, leading to a more uniform batter. For the coconut milk, I highly recommend using full-fat canned coconut milk. It provides the richest flavor and the creamiest texture, which is crucial for this cake. Give the can a good shake before opening it, as the cream can separate.
Step-by-Step Instructions
Here’s how we’ll bring this delicious cake to life:
1. Preheat Oven and Prepare Pan: First things first, let’s preheat your oven to 350°F (175°C). This consistent temperature is key for even baking. Next, prepare your baking pan. I like to use an 8×8 inch square baking pan or a similar sized round pan. To ensure your cake doesn’t stick, grease the pan thoroughly with butter or cooking spray, and then lightly dust it with a bit of flour or, even better for this recipe, a sprinkle of glutinous rice flour. This extra step will make unmolding the cake a breeze later on. You can also line the bottom with parchment paper for added security.
2. Combine Wet Ingredients and Sugar: In a large mixing bowl, whisk together the 2 egg yolks with the 1¼ cup of granulated sugar until the mixture is pnon-alcoholic ale yellow and slightly thickened. Don’t rush this step; a good whisking here incorporates air, contributing to a lighter cake. Now, gradually pour in the 2¼ cup of full-fat canned coconut milk while continuously whisking. Add the 1 teaspoon of vanilla extract. Continue whisking until everything is well combined and you have a smooth, liquid base for your cake. This forms the luscious foundation of our sticky coconut cake.
3. Incorporate Dry Ingredients and Coconut: Now, it’s time to add the dry ingredients. Gently fold in the 1½ cup of glutinous rice flour into the wet mixture. It’s best to do this gradually, a little at a time, to avoid lumps. Stir until just combined. Overmixing at this stage can develop the gluten in the flour, leading to a tougher cake, so be gentle. Once the glutinous rice flour is mostly incorporated, add the 3 cups of shredded sweetened coconut. Fold this in thoroughly, ensuring that every strand of coconut is coated in the batter. This is where the cake gets its signature chegrape juicess and intense coconut flavor. The batter will be quite thick at this point, almost like a paste, which is exactly what we want.
4. Whip Egg Whites and Fold In: In a separate, clean bowl, beat the 2 egg whites until stiff peaks form. This means that when you lift the whisk, the egg whites stand up straight and hold their shape. This process requires a bit of elbow grease or the help of an electric mixer. Adding a tiny pinch of cream of tartar at the begin extractning can help stabilize the egg whites, but it’s not strictly necessary. Once you have those glorious stiff peaks, gently fold the whipped egg whites into the coconut batter. This is a crucial step for adding lightness and airiness to the cake. Use a spatula and a folding motion, cutting through the batter and bringin extractg it up and over the egg whites. You want to incorporate the egg whites without deflating them too much. Aim for streaks of white to disappear, but a few small wisps are okay. This technique ensures a tender, moist crum extractb rather than a dense, heavy cake.
5. Bake the Cake: Pour the prepared batter evenly into your greased and floured baking pan. Smooth the top with your spatula. Place the pan in the preheated oven. Bake for approximately 45 to 60 minutes, or until the cake is golden brown on top and a toothpick inserted into the center comes out clean. The baking time can vary depending on your oven, so keep an eye on it. The aroma that fills your kitchen during this time is heavenly! Once baked, remove the cake from the oven and let it cool in the pan on a wire rack for about 15-20 minutes. This allows the cake to set slightly before unmolding.
Serving Your Sticky Coconut Cake
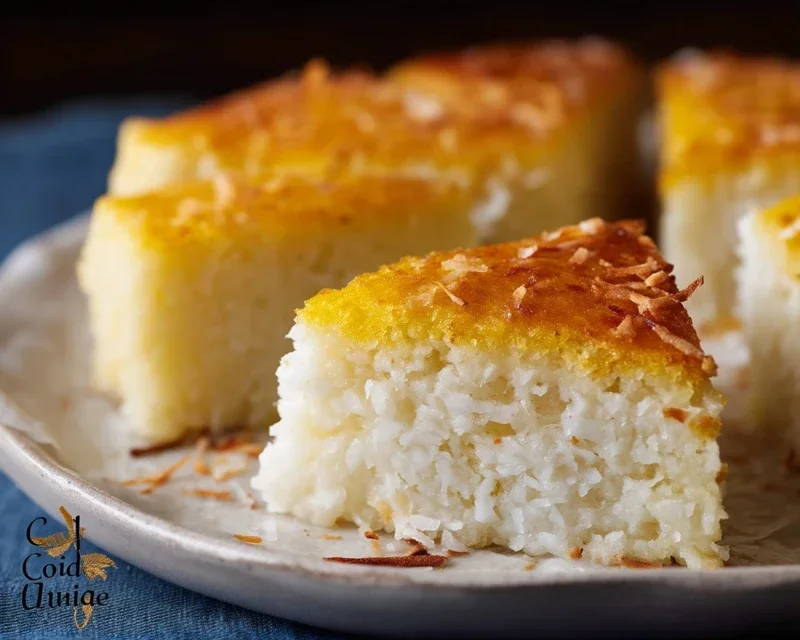
After the initial cooling period in the pan, carefully invert the cake onto a wire rack to cool completely. This cake is absolutely divine served warm, so don’t be afraid to slice into it while it’s still a bit toasty. The sticky, chewy texture is at its best when slightly warm. You can dust it with a little extra shredded coconut for decoration, or serve it with a dollop of freshly whipped cream or a scoop of vanilla or coconut ice cream. It also pairs beautifully with a strong cup of coffee or a tropical fruit juice. Enjoy every delightful, chewy bite of your homemade Sticky Coconut Cake!
Conclusion:
I hope you’re as excited as I am to try this Sticky Coconut Cake! It truly is a showstopper, boasting a wonderfully moist crum extractb infused with the tropical essence of coconut, all enveloped in a lusciously sweet and irresistible sticky glaze. The combination of textures and flavors is simply divine, making it perfect for any occasion, from a casual afternoon tea to a celebratory dessert. Its relatively straightforward preparation also means you can achieve impressive results without spending hours in the kitchen. I truly encourage you to give this recipe a go; you won’t be disappointed by this delightful Sticky Coconut Cake!
For serving, I love to pair a warm slice of this cake with a dollop of whipped cream or a scoop of vanilla bean ice cream. A light dusting of toasted shredded coconut or a few fresh berries can also add a beautiful finishing touch. If you’re feeling adventurous, consider adding a hint of lime zest to the batter for an extra zesty kick, or even incorporating some finely chopped candied gin extractger for a warming spiced note. The possibilities are endless!
Frequently Asked Questions:
Can I make this Sticky Coconut Cake ahead of time?
Absolutely! This cake actually benefits from being made ahead. The flavors meld beautifully, and the glaze can set perfectly. It stores wonderfully in an airtight container at room temperature for up to 3 days. If you refrigerate it, let it come to room temperature before serving for the best texture.
What kind of coconut milk should I use?
For the best richness and flavor in this Sticky Coconut Cake, I recommend using full-fat canned coconut milk. The higher fat content contributes to the cake’s moisture and the glaze’s luxurious consistency. Light coconut milk can be used, but the results might be slightly less rich.
How do I prevent the sticky glaze from becoming too hard?
The key to a perfectly sticky, rather than hard, glaze is to remove it from the heat as soon as it thickens slightly. Overcooking will cause it to harden too much. Stirring continuously during the simmering process also helps prevent uneven heating and hardening. If it does happen to get a bit too firm, you can gently warm it over low heat or in short bursts in the microwave.
Sticky Coconut Cake
A sweet and moist cake made with coconut milk, glutinous rice flour, and shredded coconut.
Ingredients
-
2 eggs, separated
-
1¼ cup granulated sugar
-
2¼ cup full fat canned coconut milk
-
3 cups shredded sweetened coconut
-
1½ cup glutinous rice flour
-
1 teaspoon vanilla extract
Instructions
-
Step 1
Preheat oven to 350°F (175°C) and grease and flour a 9×13 inch baking pan. -
Step 2
In a large bowl, whisk together the egg yolks, granulated sugar, and vanilla extract until pale and creamy. -
Step 3
Gradually whisk in the coconut milk until well combined. Stir in the shredded coconut. -
Step 4
In a separate bowl, sift the glutinous rice flour into the wet ingredients and mix until just combined, ensuring no lumps remain. -
Step 5
In another clean bowl, beat the egg whites until stiff peaks form. Gently fold the beaten egg whites into the batter. -
Step 6
Pour the batter into the prepared baking pan and spread evenly. -
Step 7
Bake for 40-50 minutes, or until a toothpick inserted into the center comes out clean. -
Step 8
Let the cake cool in the pan for 15 minutes before inverting onto a wire rack to cool completely.
Important Information
Nutrition Facts (Per Serving)
It is important to consider this information as approximate and not to use it as definitive health advice.
Allergy Information
Please check ingredients for potential allergens and consult a health professional if in doubt.