No Bake Oreo Nutella Cheesecake – Easy Dessert
No Bake Oreo Nutella Cheesecake is the ultimate dessert fantasy come to life. If you’re anything like me, the mere mention of this glorious combination sparks an immediate craving. We’re talking about layers of crushed Oreo cookies, a velvety smooth cream cheese filling infused with that irresistible hazelnut chocolate magic of Nutella, and an extra sprinkle of Oreo goodness on top. What’s not to adore? This dessert delivers pure indulgence without the fuss of an oven. It’s incredibly forgiving, wonderfully decadent, and always a showstopper. The perfect balance of crunchy, creamy, chocolatey, and nutty makes this No Bake Oreo Nutella Cheesecake a guaranteed crowd-pleaser and my go-to for any occasion that calls for something truly special. Get ready to experience dessert bliss!
Why This No Bake Oreo Nutella Cheesecake is a Must-Try
Prepare to be amazed by its simplicity and incredible flavor.
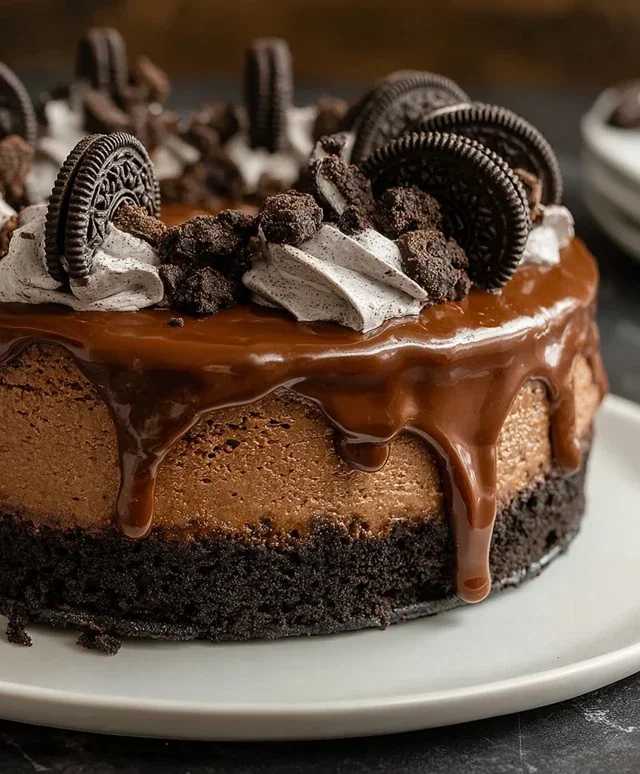
No Bake Oreo Nutella Cheesecake
Oh, the sheer joy of a no-bake cheesecake! Especially when it’s loaded with the irresistible combination of Oreo cookies and creamy Nutella. This No Bake Oreo Nutella Cheesecake is a dream come true for any chocolate and hazelnut lover. It’s surprisingly easy to whip up, requiring no oven time, which makes it perfect for those hot summer days or when you’re just craving a decadent dessert without the fuss. The base is a crunchy, chocolatey Oreo crust, followed by a luscious, smooth cheesecake filling infused with Nutella, and then crowned with even more Oreos and a delightful Nutella drizzle. Let’s get started on creating this showstopper!
Ingredients:
Making the Oreo Crust
The foundation of any great cheesecake is its crust, and this one is a classic for a reason. The crushed Oreos provide a wonderful chocolatey crunch that perfectly complements the creamy filling.
1. Begin extract by preparing your base. In a medium bowl, combine the 200g of crushed Oreos with the 50g of melted butter. Mix them thoroughly until all the cookie crum extractbs are evenly moistened. You want the mixture to resemble wet sand; it should hold together when you press it. If it feels too dry, you can add a tiny bit more melted butter, but be careful not to make it greasy.
2. Next, press this Oreo mixture firmly into the bottom of a 9-inch springform pan. You can use the back of a spoon or the bottom of a measuring cup to create an even, compact layer. This step is crucial for a sturdy crust that won’t crum extractble when you slice into your cheesecake. Make sure to press it up the sides slightly if you desire a more defined edge. Place the prepared crust in the refrigerator to chill while you work on the filling. This chilling time will help the crust set and become firm.
Crafting the Luscious Nutella Cheesecake Filling
This is where the magic happens! The combination of cream cheese and Nutella creates a rich, velvety smooth filling that is utterly divine.
3. In a large mixing bowl, beat the softened 500g of cream cheese until it is completely smooth and free of lumps. Using softened cream cheese is key here; cold cream cheese will result in a lumpy filling, which is definitely not what we want. You can use an electric mixer on medium speed or a sturdy whisk if you’re feeling energetic. Once the cream cheese is smooth, gradually beat in the 200g of Nutella until it’s fully incorporated and the mixture is a beautiful, uniform chocolate-hazelnut color. Scrape down the sides of the bowl as needed to ensure everything is well combined.
4. In a separate bowl, whip the 200g of heavy whipping cream with the 50g of sugar until stiff peaks form. This means that when you lift the whisk or beaters, the cream will stand up straight without collapsing. Be careful not to over-whip, or you’ll end up with butter! Once the cream is whipped to perfection, gently fold it into the cream cheese and Nutella mixture. Folding is a technique where you use a spatula to gently incorporate the whipped cream, preserving its airiness. Do this in two or three additions, being careful not to deflate the whipped cream too much. The goal is a light, airy, and incredibly smooth cheesecake filling.
5. Now, it’s time to add some texture to your filling. Gently fold in the 100g of chopped Oreos into the cheesecake mixture. These little chunks of Oreo will provide delightful pops of chocolatey crunch within each bite of the creamy filling. This step adds an extra layer of deliciousness and visual appeal.
Assembling and Chilling Your Masterpiece
With all the components ready, it’s time to bring them together and let the cheesecake work its magic in the fridge.
6. Retrieve your chilled Oreo crust from the refrigerator. Spoon the luscious Nutella cheesecake filling evenly over the crust. Use a spatula to smooth the top, creating a nice, even surface. For an extra touch of crunchy goodness, sprinkle the 5 crushed Oreos (just the dark cookie part, no filling) over the top of the cheesecake filling. This adds a subtle texture and visual contrast.
7. Finally, it’s time for the indulgent toppings. Gently warm the 100g of Nutella for drizzling. You can do this in the microwave for about 10-15 second intervals, stirring in between, until it’s pourable but not hot. Drizzle the warmed Nutella decoratively over the top of the cheesecake. You can use a spoon or a piping bag with a thin tip for more control. For the final flourish, arrange the 6 whole Oreos around the edge or in the center of the cheesecake as garnish.
The Final Crucial Step: Chilling!
Your No Bake Oreo Nutella Cheesecake is almost ready, but it needs time to set and develop its full flavor and texture. Cover the springform pan loosely with plastic wrap, making sure it doesn’t touch the surface of the cheesecake. Refrigerate for at least 4-6 hours, or preferably overnight. This crucial chilling period allows the cheesecake to firm up properly, making it easy to slice and serve. The longer it chills, the better the flavors will meld together, and the firmer the texture will become.
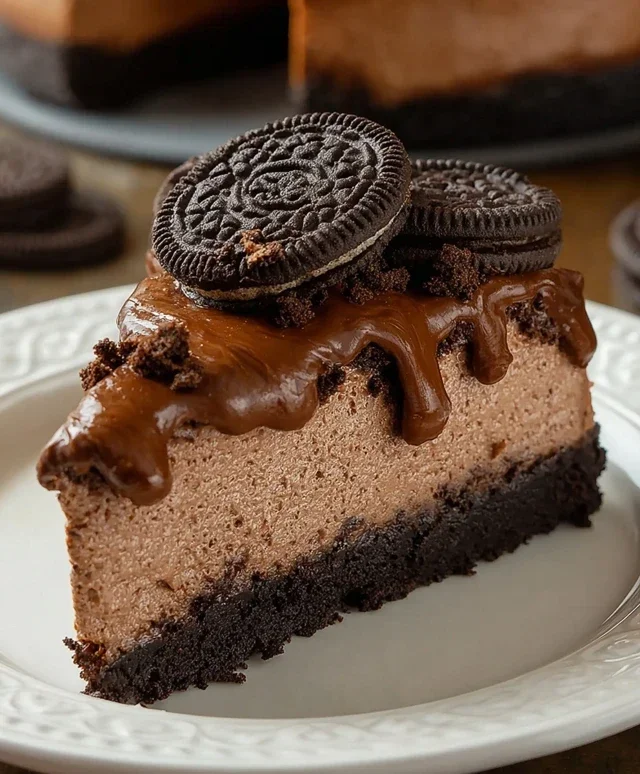
Once your cheesecake is thoroughly chilled and set, you can carefully release the sides of the springform pan. Serve chilled, and get ready for the compliments! This No Bake Oreo Nutella Cheesecake is a guaranteed crowd-pleaser, perfect for birthdays, holidays, or simply because you deserve a delicious treat. Enjoy every single creamy, chocolatey, hazelnutty bite!
Conclusion:
There you have it – a recipe for a truly decadent No Bake Oreo Nutella Cheesecake that’s surprisingly simple to whip up! This dessert is a winner because it requires no oven time, making it perfect for those hot summer days or when you’re simply craving something sweet without the fuss. The irresistible combination of creamy cheesecake, crunchy Oreo crust, and rich Nutella is a match made in dessert heaven. I truly hope you get a chance to try this delightful treat soon!
This No Bake Oreo Nutella Cheesecake is incredibly versatile. It’s fantastic served simply as is, allowing the flavors to shine. However, for an extra touch of indulgence, consider topping it with a drizzle of melted Nutella, a scattering of chopped Oreos, or even some fresh berries for a pop of color and freshness. For variations, you could experiment with adding a swirl of Nutella directly into the cheesecake filling for an even more intense hazelnut chocolate flavor, or even incorporate some finely chopped toasted hazelnuts for added texture. Don’t be afraid to get creative and make it your own!
Frequently Asked Questions:
Can I make this cheesecake ahead of time?
Absolutely! This No Bake Oreo Nutella Cheesecake is actually best made a few hours ahead, or even the day before you plan to serve it. This allows the cheesecake to firm up properly in the refrigerator, resulting in a perfect texture. Just cover it tightly with plastic wrap before refrigerating.
What if I don’t have a springform pan?
No worries if you don’t have a springform pan! You can still make this delicious cheesecake in a regular pie dish or even individual ramekins. If using a pie dish, the crust will be less defined on the sides, but the flavor will be just as amazing. For ramekins, you can adjust the baking time, though since it’s no-bake, you’re just looking for it to set.
How long will this cheesecake last in the refrigerator?
Stored properly in an airtight container in the refrigerator, your No Bake Oreo Nutella Cheesecake should stay delicious for about 3-4 days. The crust might lose some of its initial crispness over time, but the cheesecake itself will remain wonderfully creamy and flavorful.
No Bake Oreo Nutella Cheesecake
A decadent no-bake cheesecake combining the classic flavors of Oreo and Nutella, perfect for any occasion.
Ingredients
-
200g crushed Oreos
-
50g melted butter
-
500g cream cheese, softened
-
200g Nutella
-
200g heavy whipping cream (35%)
-
50g sugar
-
100g chopped Oreos
-
100g Nutella
-
100g Nutella, warmed for drizzling
-
5 crushed Oreos (no filling)
-
6 whole Oreos for garnish
Instructions
-
Step 1
Combine crushed Oreos and melted butter. Press into the base of a springform pan. -
Step 2
In a bowl, beat cream cheese until smooth. Add Nutella and beat until combined. -
Step 3
In a separate bowl, whip heavy cream and sugar until stiff peaks form. Fold into the cream cheese mixture. -
Step 4
Stir in chopped Oreos and the second portion of Nutella into the cream cheese mixture. -
Step 5
Pour the cheesecake filling over the Oreo crust and smooth the top. -
Step 6
Chill in the refrigerator for at least 4 hours, or until firm. -
Step 7
Before serving, drizzle with warmed Nutella and garnish with whole Oreos and crushed Oreos (no filling).
Important Information
Nutrition Facts (Per Serving)
It is important to consider this information as approximate and not to use it as definitive health advice.
Allergy Information
Please check ingredients for potential allergens and consult a health professional if in doubt.