Easy Sourdough Bread Recipe – Perfect Crusty Loaf
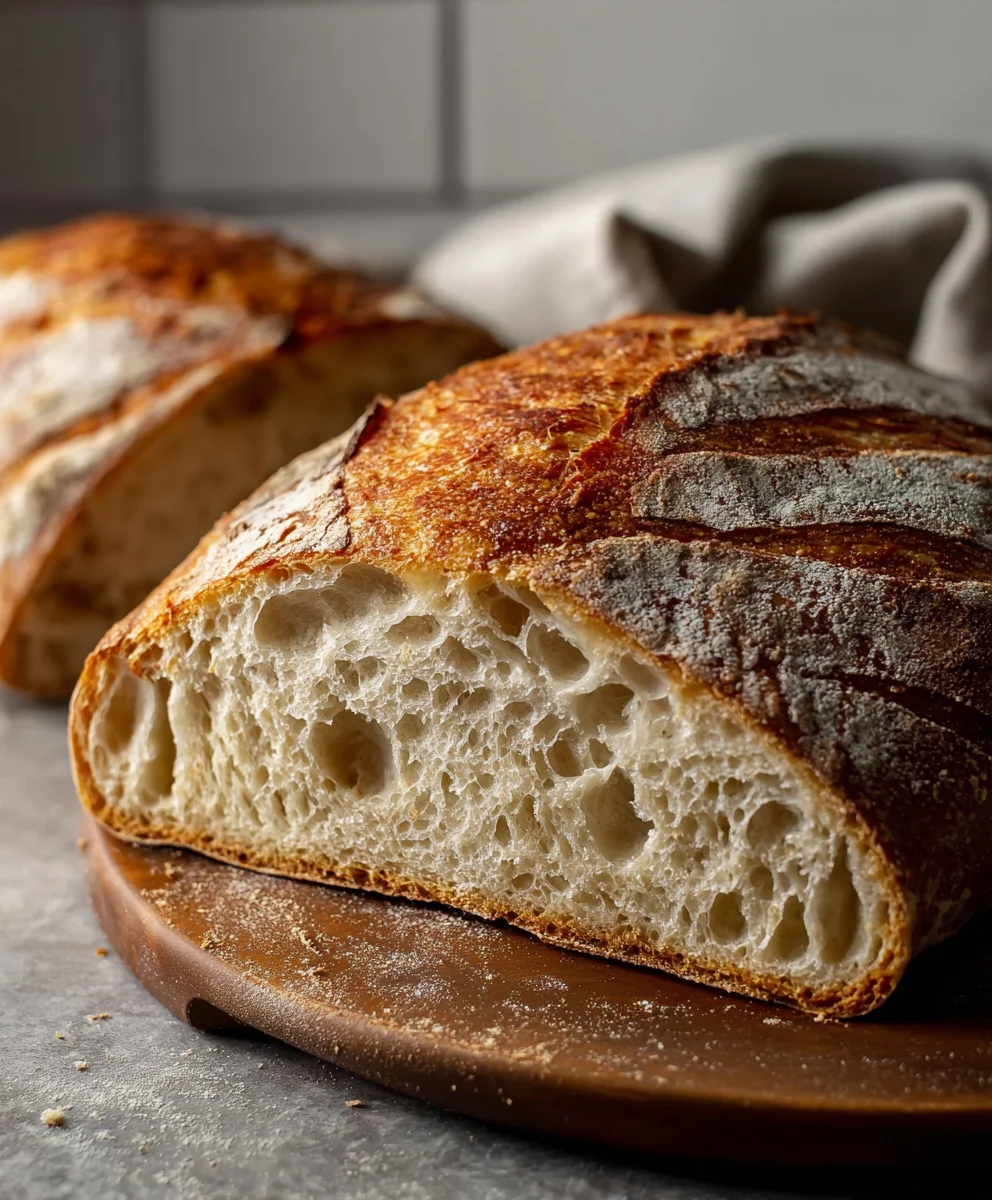
Sourdough bread, with its distinctive tang and beautifully blistered crust, is more than just a loaf of bread; it’s an experience. The irresistible aroma that fills your kitchen as it bakes, the satisfying crackle when you slice into it, and that wonderfully chewy interior – it’s no wonder so many of us are captivated by the magic of sourdough bread. What truly sets this ancient art apart is the living starter, a symbiotic culture of yeast and bacteria that requires patience and a touch of love. This slow fermentation process not only imparts that characteristic sourdough flavor but also makes the bread more digestible and nutrient-rich. Forget those bland, mass-produced loaves. Today, we’re diving into the heart of creating a truly exceptional sourdough bread that will elevate your home baking to an entirely new level. Prepare to be amazed by the depth of flavor and the sheer satisfaction of crafting this culinary masterpiece from scratch.
Ingredients:
- 4 cups (500g) bread flour or all-purpose flour
- 1⅔ cups (375g) warm water (around 80-90°F or 27-32°C)
- 1 cup (200g) active sourdough starter (fed and bubbly)
- 2 teaspoons (10g) salt
Preparing the Dough
Mixing the Dough
The journey to a perfect sourdough loaf begin extracts with mixing the ingredients. In a large mixing bowl, combine your 4 cups (500g) of bread flour or all-purpose flour with the 1⅔ cups (375g) of warm water. Stir them together with a spoon or your hands until no dry flour remains. This initial stage is called autolyse, and it’s a crucial step for gluten development in sourdough. Allowing the flour to hydrate fully without the salt and starter will make the dough more pliable and easier to work with later. Let this mixture rest for about 30 minutes. You’ll notice the dough starting to become smoother and more cohesive as the flour absorbs the water.
Adding the Starter and Salt
After the autolyse period, it’s time to introduce the magic ingredient: your 1 cup (200g) of active sourdough starter. Pour it over the rested dough. Now, add the 2 teaspoons (10g) of salt. It’s important to add the salt after the initial hydration because salt can hinder gluten development if added too egin extracty. Begin incorporating the starter and salt into the dough. You can do this by pinching and folding the dough, or by using a Danish dough whisk. Continue mixing and folding until the starter and salt are evenly distributed throughout the mass. The dough will feel quite shaggy at this point, which is perfectly normal. Don’t worry about achieving a perfectly smooth ball just yet.
Developing the Dough
Bulk Fermentation (First Rise)
Now comes the bulk fermentation, the first major rise where your sourdough starter gets to work. This process typically takes anywhere from 4 to 8 hours, depending on the ambient temperature of your kitchen and the activity of your starter. During this time, we’ll perform a series of “stretch and folds.” Every 30 to 60 minutes for the first 2-3 hours of fermentation, wet your hands slightly and grab one side of the dough, stretch it upwards, and then fold it over the center. Rotate the bowl a quarter turn and repeat this process for all four sides. This gentle manipulation builds strength and elasticity in the dough, trapping the gases produced by the yeast and bacteria. You’ll observe the dough becoming smoother, more elastic, and gradually increasing in volume. It should feel airy and show some small bubbles on the surface by the end of this stage.
Shaping the Loaf
Once your dough has completed its bulk fermentation and looks visibly puffier and gassier, it’s time to shape it. Gently turn the dough out onto a lightly floured surface. You want to handle it with care to preserve the air bubbles created during gin extractmentation. Begin by pre-shaping the dough into a rough round or oblong shape. Let it rest, covered with a clean kitchen towel, for about 20-30 minutes. This brief rest allows the gluten to relax, making final shaping easier. Then, perform your final shaping. For a round loaf (boule), gently cup your hands around the dough and rotate it on the counter, creating tension on the surface. For an oblong loaf (batard), fold the top third down, then the bottom third up, and then pinch the seam shut. Ensure you create good surface tension, as this will help the loaf hold its shape during baking.
Proofing and Baking
Cold Proofing (Second Rise)
After shaping, place your dough seam-side up into a well-floured banneton or a bowl lined with a floured tea towel. Cover it loosely with plastic wrap or a damp towel to prevent it from drying out. Now, the dough needs its final proof. For the best flavor development and an easier-to-score loaf, we’ll opt for a long, cold proof in the refrigerator. Place the covered dough in the refrigerator for at least 12 hours, or even up to 24 hours. This slow, cold fermentation allows complex flavors to develop and makes the dough firm and easy to handle for scoring. You’ll notice the dough will puff up slightly in the fridge, but it won’t double in size.
Baking the Sourdough Bread
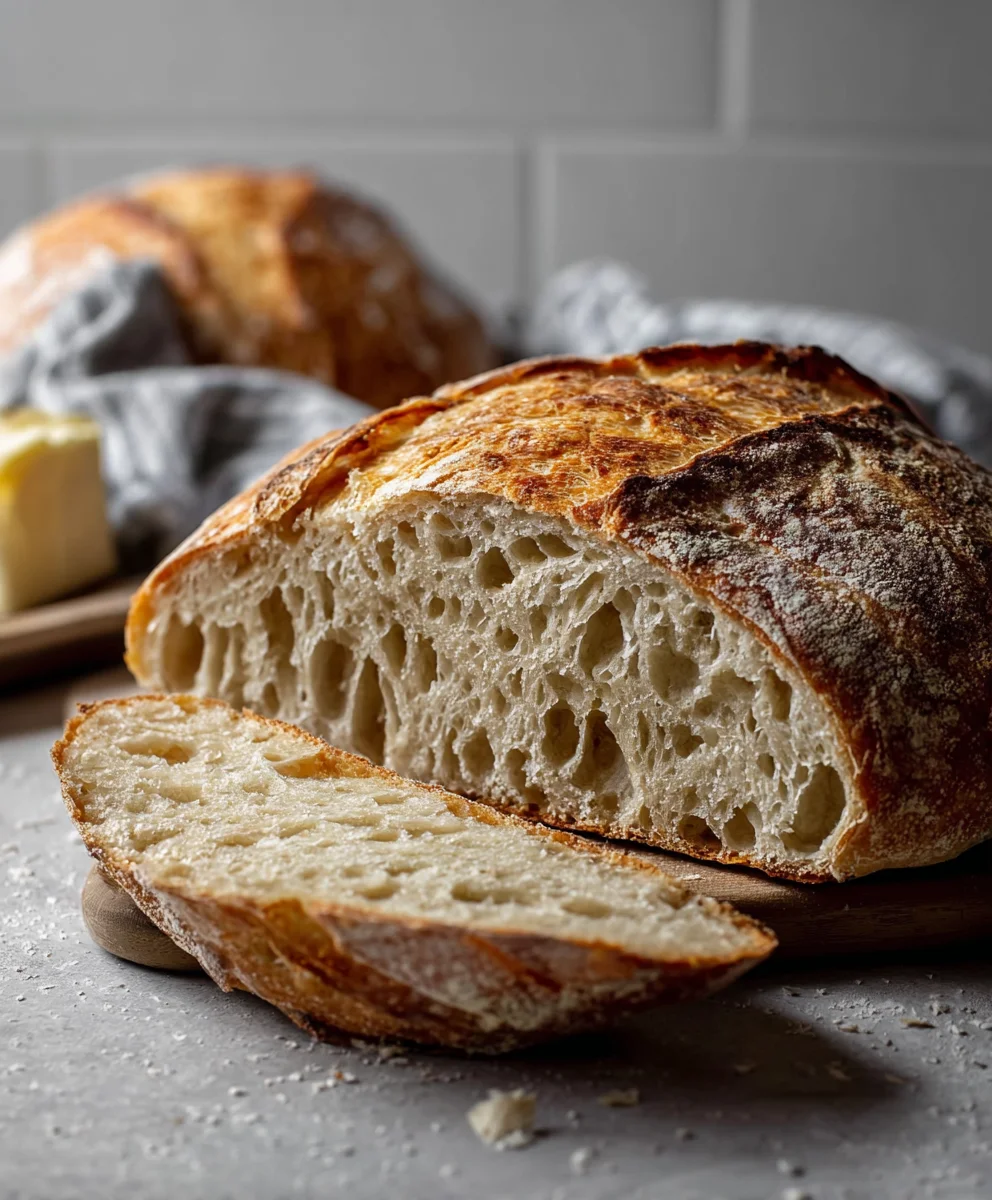
Preheat your oven to 450°F (230°C) with your Dutch oven or baking vessel inside for at least 30 minutes. This ensures the pot is screaming hot, which is essential for a good oven spring. Once the oven and Dutch oven are fully preheated, carefully remove the Dutch oven from the oven. Gently flip your proofed dough out of the banneton directly into the hot Dutch oven. If the dough doesn’t release smoothly, give the banneton a gentle tap. Score the top of the loaf with a lame or a sharp knife. This allows the bread to expand predictably in the oven. Cover the Dutch oven with its lid and carefully place it back into the hot oven. Bake for 20 minutes with the lid on. After 20 minutes, remove the lid, and continue baking for another 20-25 minutes, or until the crust is a deep golden brown and the internal temperature of the bread reaches around 205-210°F (96-99°C). The aroma filling your kitchen will be absolutely divine!
Conclusion:
There you have it – your comprehensive guide to crafting perfect Sourdough Bread right in your own kitchen! We’ve walked through the essential steps, from nurturing your starter to achieving that coveted crust and airy crum extractb. Remember, the journey of sourdough is one of patience and practice, so don’t be discouraged if your first loaf isn’t picture-perfect. Each bake is a learning experience, bringin extractg you closer to your ideal loaf.
This versatile Sourdough Bread is fantastic served simply with butter, or as the base for your favorite sandwiches. It also makes a delightful accompaniment to soups and stews. For variations, consider adding herbs like rosemary or thyme to the dough, or even incorporating a handful of seeds for added texture and flavor.
We encourage you to embrace the process, experiment with your starter’s activity, and most importantly, enjoy the incredibly rewarding experience of baking your own delicious Sourdough Bread. Happy baking!
Frequently Asked Questions:
Why is my sourdough starter not bubbly?
A sluggish starter can be due to a few reasons. Ensure you’re feeding it consistently with the correct ratio of flour and water, and that the environment is warm enough (around 75-80°F is ideal). If you’ve recently fed it, it might just be a little slow to show activity. If it’s consistently inactive, you may need to refresh it more frequently or use a different type of flour.
How can I achieve a crispy crust on my sourdough bread?
A crispy crust is often achieved by baking in a preheated Dutch oven, which traps steam during the initial baking phase. This steam allows the crust to expand fully before it sets. Additionally, ensure your oven is at the correct high temperature, and consider a final few minutes of baking with the lid off to allow the crust to brown and crisp up. Removing the bread from the Dutch oven and placing it directly on the oven rack for the last 10-15 minutes can also help.
Easy Sourdough Bread Recipe – Perfect Crusty Loaf
A simple recipe for a delicious, crusty sourdough loaf with a perfectly chewy interior. This recipe guides you through the entire process, from mixing to baking.
Ingredients
-
4 cups (500g) bread flour or all-purpose flour
-
1⅔ cups (375g) warm water (around 80-90°F or 27-32°C)
-
1 cup (200g) active sourdough starter (fed and bubbly)
-
2 teaspoons (10g) salt
-
Lightly floured surface for shaping
-
Clean kitchen towel
-
Well-floured banneton or bowl lined with a floured tea towel
-
Plastic wrap or damp towel for covering
Instructions
-
Step 1
Combine bread flour and warm water in a large bowl. Stir until no dry flour remains. This is the autolyse stage. Let rest for 30 minutes. -
Step 2
Add active sourdough starter and salt to the dough. Mix and fold until evenly distributed. The dough will be shaggy. -
Step 3
Perform bulk fermentation (first rise) for 4-8 hours. Every 30-60 minutes for the first 2-3 hours, perform stretch and folds by gently stretching one side of the dough upwards and folding it over the center, rotating the bowl and repeating for all four sides. -
Step 4
Gently turn the dough onto a lightly floured surface. Pre-shape into a rough round or oblong. Let rest, covered, for 20-30 minutes. Then, perform final shaping, creating good surface tension. -
Step 5
Place shaped dough seam-side up into a floured banneton or lined bowl. Cover and refrigerate for at least 12 hours, or up to 24 hours, for cold proofing. -
Step 6
Preheat oven to 450°F (230°C) with a Dutch oven inside for at least 30 minutes. Carefully remove the hot Dutch oven, flip the proofed dough into it, and score the top. Cover and bake for 20 minutes. -
Step 7
Remove the lid from the Dutch oven and bake for another 20-25 minutes, or until the crust is deep golden brown and internal temperature reaches 205-210°F (96-99°C).
Important Information
Nutrition Facts (Per Serving)
It is important to consider this information as approximate and not to use it as definitive health advice.
Allergy Information
Please check ingredients for potential allergens and consult a health professional if in doubt.