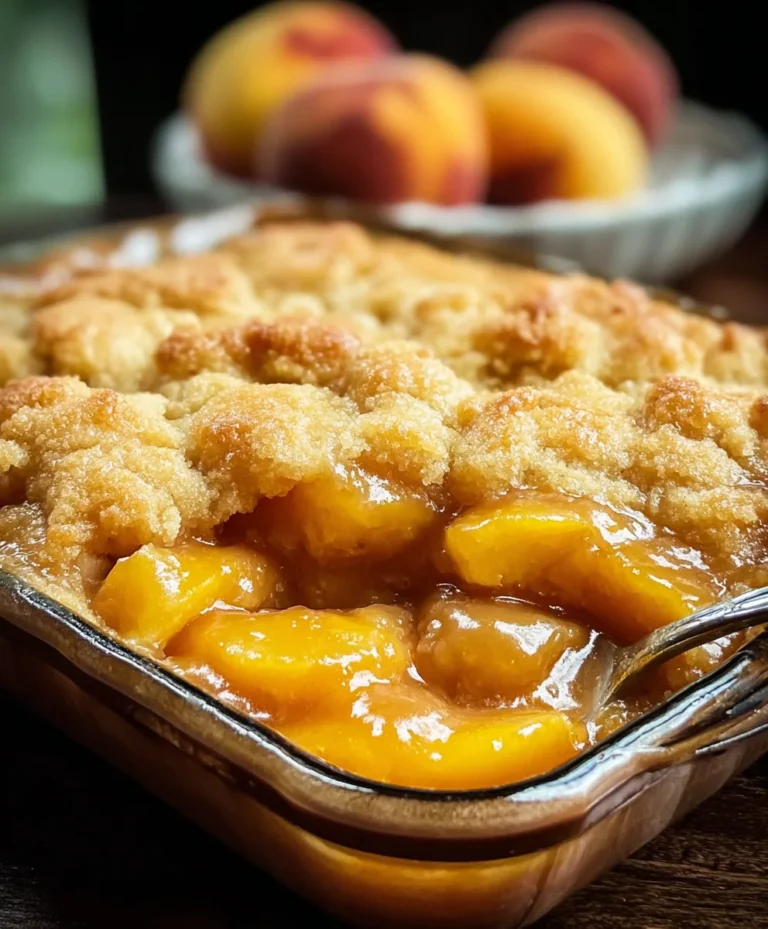
Easy Peach Hand Pies – Deliciously Simple Summer Treat
Peach hand pies are the quintessential portable taste of summer. There’s something undeniably magical about a warm, flaky pastry encasing sweet, juicy peaches, isn’t there? These delightful little pockets of sunshine have captured hearts for generations, and it’s easy to see why. They’re the perfect balance of sweet and tart, with a buttery crust that crum extractbles with every bite. What makes peach hand pies truly special is their versatility; they’re ideal for picnics, a sweet afternoon treat with coffee, or even a simple, satisfying dessert. Forget elaborate desserts; sometimes, the simplest things, like a perfectly executed peach hand pie, bring the most joy.
Why We Adore These Peach Hand Pies
A Taste of Nostalgia in Every Bite
We all have those comfort foods that evoke happy memories, and for many, peach hand pies are right at the top of that list. Whether it’s the aroma of baking peaches filling the kitchen or the satisfying crunch of the pastry, these treats bring a sense of warmth and nostalgia. They’re a sweet reminder of simpler times and sunny days. This recipe takes those beloved flavors and makes them incredibly approachable, ensuring you can recreate that magic anytime you crave it. Get ready to fall in love with these delicious peach hand pies all over again.

Peach Hand Pies
There’s something undeniably charming about a hand pie. They’re the perfect, portable pastry, a delightful little parcel of pure flavor that you can enjoy on the go, or savor with a cup of tea. And when that delicious filling is sweet, juicy peaches, well, you’ve got a winner. These Peach Hand Pies are incredibly easy to make, thanks to a few smart shortcuts, making them ideal for a quick dessert craving or a delightful addition to a picnic. We’re going to transform a can of readily available peach pie filling into these golden, flaky treasures.
Ingredients:
Making the Dough and Filling
The beauty of these hand pies lies in their simplicity. We’re using refrigerated pie crust, which is a fantastic time-saver and delivers a perfectly flaky result every time. No need to fuss with making dough from scratch when you’re craving a treat this delicious.
First things first, let’s get our peach filling ready. While the canned pie filling is already seasoned and thickened, I like to give it a little extra stir to ensure all those lovely peach chunks are evenly distributed. Sometimes, depending on the brand, the filling can be a little dense at the bottom of the can, so a good mix is key.
Now, let’s prepare our pie crusts. Carefully unroll both of your refrigerated pie crusts onto a lightly floured surface. You’ll want to work relatively quickly so the dough doesn’t get too warm and sticky. I usually like to cut each crust into four equal circles. You can use a biscuit cutter, a cookie cutter, or even the rim of a wide glass. Aim for circles that are roughly 5-6 inches in diameter. This will give you enough space to fold the dough over the filling without it oozing out.
Assembling Your Hand Pies
Once your dough circles are ready, it’s time to start filling them. Lay out eight of your dough circles on a parchment-lined baking sheet. This will make them easier to transfer later. Now, spoon about 2-3 tablespoons of the peach pie filling onto one half of each dough circle, leaving a small border around the edge. Be careful not to overfill them, as this can make sealing them a bit tricky and increase the chances of leakage during frying. A gentle pat down of the filling can help it settle.
Now for the magic of sealing! Take the other eight dough circles and place them on top of the filled circles. Gently press the edges together to seal. You can use your fingers to crimp them, or for a more defined look and a super secure seal, use the tines of a fork to press along the edges. This not only looks pretty but also ensures that no delicious peach filling escapes during the frying process. If the dough feels a little sticky, a light dusting of flour on your fingers can help.
For an extra touch of security and to prevent any puffing up during frying, it’s a good idea to cut a small vent in the top of each hand pie. A small slit or a few tiny holes with the tip of a knife will allow steam to escape.
Frying to Golden Perfection
Now comes the fun part – frying! Heat about 1-2 inches of vegetable oil in a large, heavy-bottomed skillet or a Dutch oven over medium heat. You want the oil to be hot enough to fry the pies to a beautiful golden brown, but not so hot that they burn on the outside before the inside is heated through. A good temperature to aim for is around 350-365 degrees Fahrenheit. You can test if the oil is ready by dropping a tiny scrap of dough into it; it should sizzle and float to the surface immediately.
Carefully place 2-3 hand pies into the hot oil at a time. It’s important not to overcrowd the pan, as this will lower the oil temperature and result in soggy, greasy pies. Let them fry for about 2-3 minutes per side, or until they are a rich, golden brown. Use a slotted spoon or tongs to carefully flip them over to cook the other side. Keep an eye on them, as they can go from perfectly golden to burnt very quickly!
Once they’re beautifully browned and puffed up, carefully remove the fried hand pies from the oil with your slotted spoon. Place them on a wire rack set over a baking sheet lined with paper towels. This will allow any excess oil to drain away, keeping your hand pies delightfully crisp.
Creating the Glaze
While our hand pies are still warm, let’s prepare a simple yet elegant glaze to take them to the next level. In a small bowl, whisk together the powdered sugar, corn syrup, and water until you have a smooth, pourable glaze. The corn syrup adds a lovely sheen and helps the glaze set slightly. If the glaze is too thick, add a tiny bit more water, a teaspoon at a time, until it reaches your desired consistency. If it’s too thin, add a little more powdered sugar.
Once the hand pies have cooled slightly but are still warm, you can either drizzle the glaze over them with a spoon or brush it on with a pastry brush. The warmth of the pies will help the glaze melt just a touch, creating a beautiful, slightly sticky coating. You can also skip the glaze if you prefer a less sweet treat, or dust them with a little extra powdered sugar once they’ve cooled.
Allow the glaze to set for a few minutes before serving. These Peach Hand Pies are best enjoyed warm, when the pastry is crisp and the peach filling is gooey and delicious. They make a fantastic breakfast treat, an afternoon snack, or a delightful dessert. Enjoy every single bite!

Conclusion:
There you have it – a simple yet incredibly rewarding recipe for Peach Hand Pies that’s sure to become a favorite! These delightful little pockets of peachy goodness are perfect for so many occasions. Their portability makes them ideal for picnics, packed lunches, or a sweet treat on the go. The flaky, buttery crust combined with the warm, spiced peach filling creates a truly irresistible combination that I just know you’ll love. I encourage you to give this Peach Hand Pies recipe a try; it’s easier than you might think and the results are absolutely delicious.
For serving, I love them warm, perhaps with a drizzle of vanilla glaze or a dollop of whipped cream. They’re also fantastic at room temperature for when you need a quick, satisfying dessert. Feel free to experiment with variations! Add a pinch of cinnamon or nutmeg to the filling for extra warmth, or even a splash of almond extract for a different flavor profile. You could also swap out the peaches for other seasonal fruits like apples or berries. However you choose to make them, I’m confident these Peach Hand Pies will bring a smile to your face.
Frequently Asked Questions:
Can I make the dough ahead of time?
Absolutely! You can prepare the pie dough up to two days in advance and store it tightly wrapped in the refrigerator. Let it sit at room temperature for about 15-20 minutes before rolling it out to make it more pliable. This is a great way to save time when you’re ready to assemble your Peach Hand Pies.
How do I store leftover Peach Hand Pies?
Once cooled, leftover Peach Hand Pies can be stored in an airtight container at room temperature for up to two days, or in the refrigerator for up to four days. For longer storage, you can freeze them. Once completely cooled, wrap them individually in plastic wrap and then place them in a freezer-safe bag or container. Reheat gently in a warm oven or toaster oven.
Peach Hand Pies
Delicious and easy hand pies filled with sweet peach goodness, perfect for a treat.
Ingredients
-
21 oz. can peach pie filling
-
Refrigerated pie crust
-
1/2 cup powdered sugar
-
1 teaspoon corn syrup
-
1 tablespoon water
-
Vegetable oil for frying
Instructions
-
Step 1
Prepare the glaze by whisking together powdered sugar, corn syrup, and water until smooth. -
Step 2
Unroll the refrigerated pie crust and cut out 6 circles using a biscuit cutter or a small bowl. -
Step 3
Place a spoonful of peach pie filling onto one half of each pie crust circle, leaving a small border. -
Step 4
Fold the other half of the crust over the filling and crimp the edges with a fork to seal. -
Step 5
Heat vegetable oil in a skillet over medium heat. -
Step 6
Carefully fry the hand pies for 2-3 minutes per side, until golden brown and puffed. -
Step 7
Remove from oil and drain on paper towels. Drizzle with the prepared glaze.
Important Information
Nutrition Facts (Per Serving)
It is important to consider this information as approximate and not to use it as definitive health advice.
Allergy Information
Please check ingredients for potential allergens and consult a health professional if in doubt.