Easy Honey Wheat Bread Recipe – Delicious Homemade Loaf
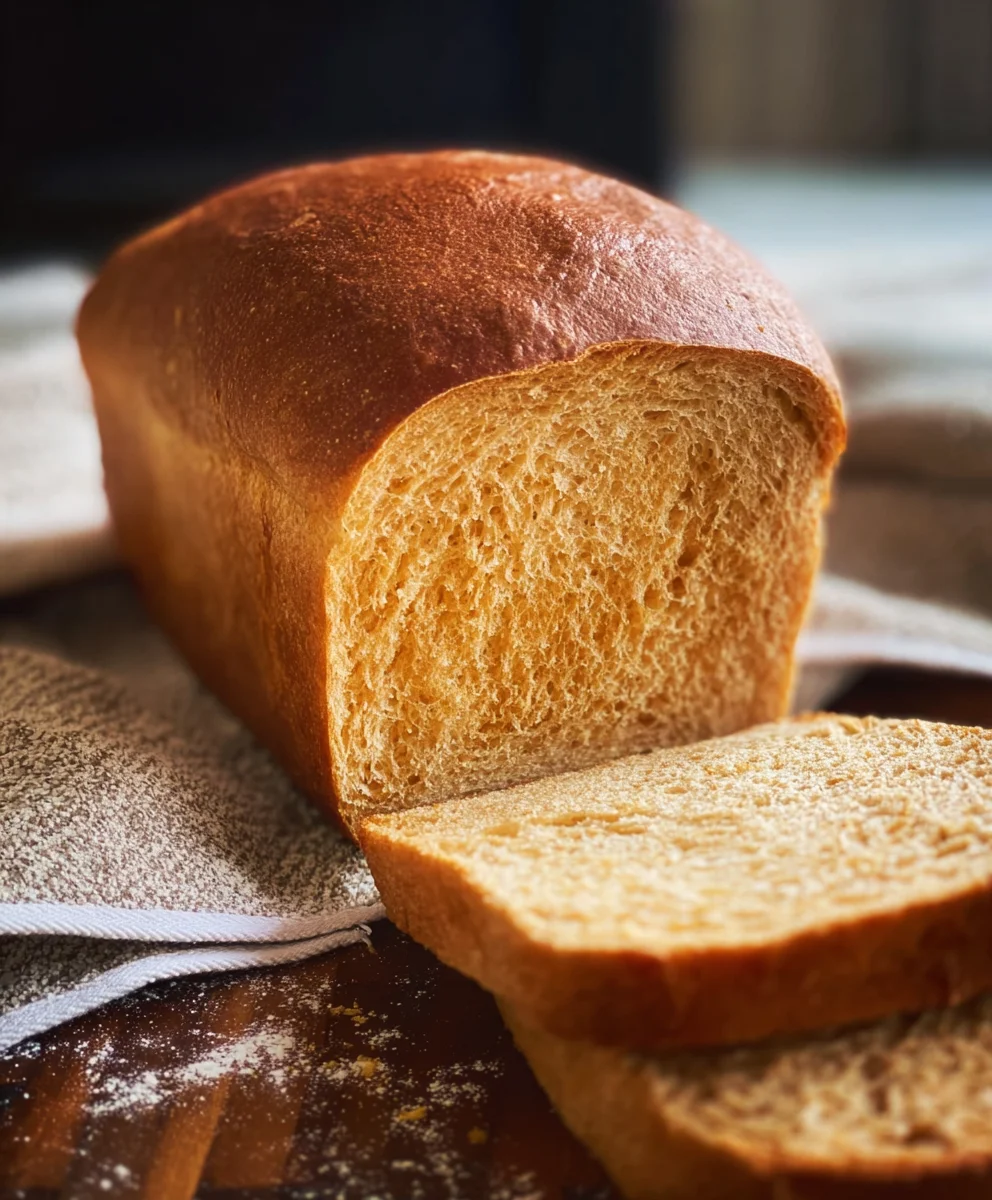
Simple Honey Wheat Bread is more than just a baked good; it’s a comforting embrace, a testament to the beauty of simple ingredients transformed into something extraordinary. There’s an undeniable magic in the aroma that fills your kitchen as this loaf bakes – a warm, inviting scent that promises deliciousness. People adore this recipe because it delivers on both flavor and ease. It’s the perfect antidote to a busy day, requiring minimal fuss but yielding maximum reward. What truly makes this Simple Honey Wheat Bread special is its perfect balance: a subtly sweet, wholesome crum extractb, enhanced by the golden touch of honey, and a satisfyingly chewy crust. It’s versatile enough for your morning toast, a hearty sandwich base, or simply enjoyed with a slather of butter. Get ready to fall in love with baking again with this foolproof and utterly delightful creation.
Ingredients:
- 2 cups warm milk (approximately 110-115 degrees Fahrenheit)
- 1-1/2 tablespoons instant yeast
- 1 teaspoon sugar
- 1/2 cup warm water
- 2-1/2 cups whole wheat flour
- 3 to 3-1/2 cups bread flour or all-purpose flour (begin extract with 3 cups and adjust as necessary)
- 3 tablespoons shortening (butter-flavored shortening is a wonderful choice for added depth)
- 1/4 cup honey
- 1 tablespoon salt
- For the Egg Wash: 1 large egg whisked with 1 tablespoon water
Preparing the Dough
Activating the Yeast and Mixing Wet Ingredients
The journey to our Simple Honey Wheat gin extractad begins with awakening the yeast. In a large mixing bowl, or the bowl of your stand mixer fitted with the dough hook, combine the 2 cups of warm milk, 1-1/2 tablespoons of instant yeast, and 1 teaspoon of sugar. The warmth of the milk is crucial here – it should feel like a comfortably warm bath, not hot. If it’s too hot, it can kill the yeast, and if it’s too cold, it won’t activate properly. Give this mixture a gentle stir, then let it sit for about 5-10 minutes. You should see a foamy, bubbly layer form on top. This “bloom” tells you your yeast is alive and ready to work its magic. While the yeast is blooming, in a separate small bowl, combine the 1/2 cup of warm water with the 1/4 cup of honey. Stir until the honey is dissolved. This honey-water mixture will be added later, contributing moisture and sweetness to our loaf.
Incorporating the Flours and Fat
Once your yeast mixture is foamy, it’s time to add the main dry ingredients. Add the 2-1/2 cups of whole wheat flour and 1 tablespoon of salt to the yeast mixture. Now, gradually add the 3 cups of bread flour (or all-purpose flour). If you’re using a stand mixer, mix on low speed until the ingredients just start to come together. If you’re mixing by hand, stir with a wooden spoon until a shaggy dough forms. At this stage, add the 3 tablespoons of shortening and the honey-water mixture to the bowl. The shortening will add richness and tenderness to the bread, and the honey will provide a subtle sweetness and a beautiful golden crust. Continue to mix on low speed (or stir by hand) until everything is roughly combined.
Kneading the Dough to Develop Gluten
This is where the structure of our Simple Honey Wheat Bread really starts to take shape. If using a stand mixer, increase the speed to medium-low and knead for 6-8 minutes. The dough should become smooth, elastic, and start to pull away from the sides of the bowl. It will be slightly tacky, but not stick excessively to your fingers. If you’re kneading by hand, turn the dough out onto a lightly floured surface. Knead by folding the dough over itself and pushing down with the heels of your hands, rotating the dough as you go. This process develops the gluten, which is essential for a good rise and a chewy texture. If the dough feels too sticky during kneading, add the remaining 1/2 cup of bread flour, a tablespoon at a time, until it reaches the desired consistency. Don’t be tempted to add too much flour, as this can result in a dry loaf. The dough should feel soft and pliable.
First Rise and Shaping
The First Proofing for Volume
Lightly grease a clean, large bowl with a little oil or cooking spray. Place the kneaded dough into the bowl, turning it once to coat the surface with oil. This prevents a crust from forming. Cover the bowl tightly with plastic wrap or a damp kitchen towel. Find a warm, draft-free spot in your kitchen for the dough to rise. This could be on top of your refrigerator, in a slightly warmed oven (turned off!), or just in a cozy corner of your counter. Let the dough rise for 1 to 1-1/2 hours, or until it has doubled in size. The time will vary depending on the warmth of your kitchen. Don’t rush this process; a good first rise is key to a light and airy loaf.
Shaping the Loaf for Baking
Once the dough has doubled, gently punch it down to release the air. Turn the dough out onto a lightly floured surface. You can shape this dough into a single large loaf or divide it into two smaller loaves, depending on your preference and baking pan size. For a single loaf, gently pat the dough into a rectangle about 8×10 inches. Starting from one of the shorter sides, roll the dough up tightly, pressing to seal the seam as you go. Pinch the ends to tuck them under and seal them as well. This creates a taut surface, which helps the loaf hold its shape during baking. If you’re making two loaves, divide the dough in half and shape each piece similarly.
Second Rise and Baking
The Second Proofing for Final Shape
Lightly grease your loaf pan(s) or a baking sheet if you are baking freeform. Carefully place the shaped dough into the prepared pan(s), seam-side down. Again, cover the loaf pan loosely with plastic wrap or a clean kitchen towel and let it rise in a warm place for another 45-60 minutes, or until the dough has nearly doubled in size and looks puffy. It should rise just above the rim of the pan. This second rise is crucial for achieving that beautiful, domed top on your Simple Honey Wheat Bread. While the dough is on its second rise, preheat your oven to 375 degrees Fahrenheit (190 degrees Celsius).
Baking to Golden Perfection
About 10 minutes before the second rise is complete, prepare the egg wash. In a small bowl, whisk together 1 large egg and 1 tablespoon of water until well combined. Just before placing the bread into the preheated oven, gently brush the top of the loaf(ves) with the egg wash. This will give your bread a lovely golden-brown, shiny crust. Place the loaf pan(s) on the middle rack of your preheated oven. Bake for 30-40 minutes for a single loaf, or 25-30 minutes for two smaller loaves, or until the crust is a deep golden brown and the internal temperature of the bread registers 190-200 degrees Fahrenheit (88-93 degrees Celsius) on an instant-read thermometer. If the crust is browning too quickly, you can loosely tent the loaf with aluminum foil.
Cooling and Enjoying
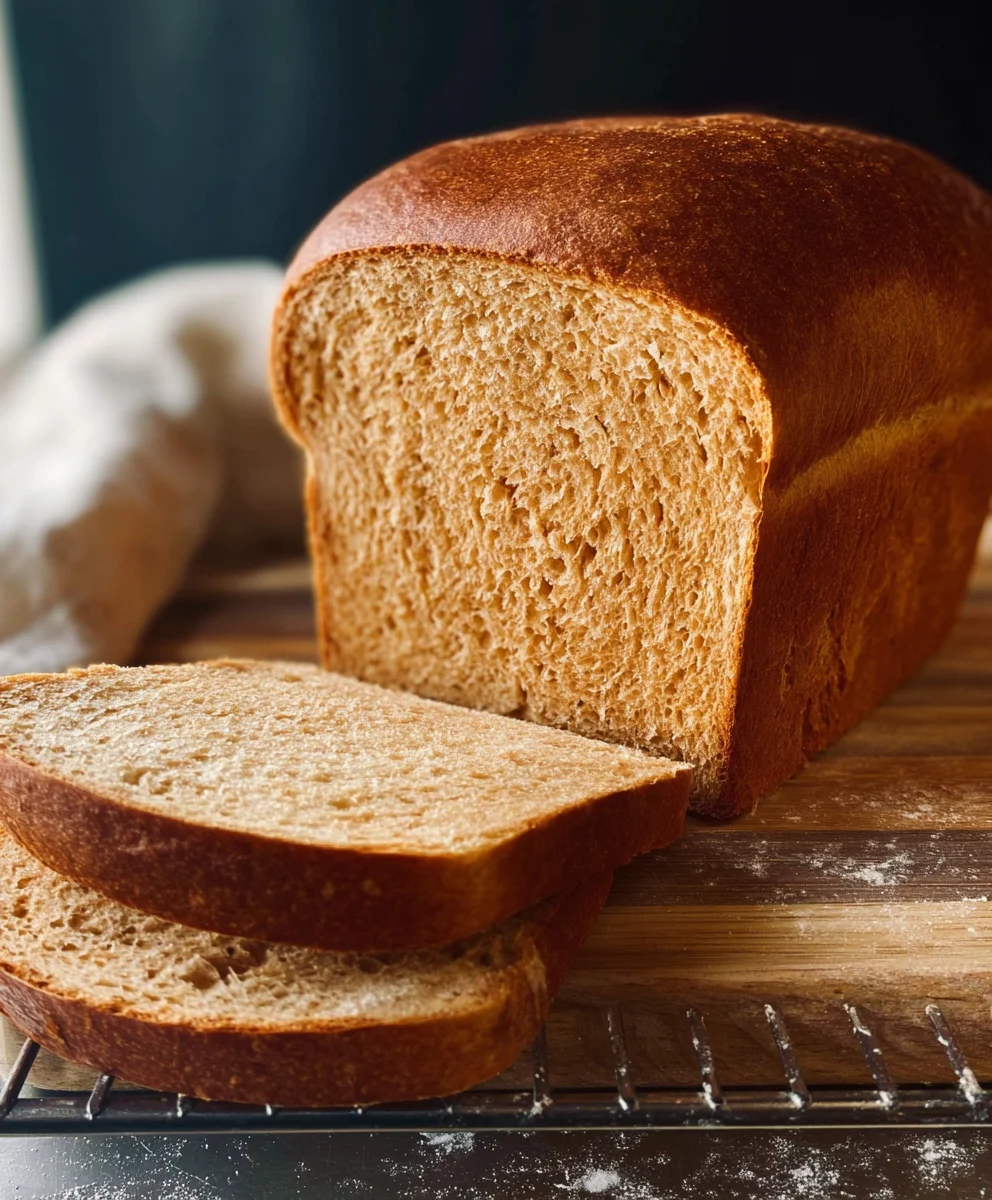
Once baked to perfection, carefully remove the bread from the oven. Immediately turn the loaf(ves) out of the pan(s) onto a wire cooling rack. This step is important to prevent the bottom of the crust from becoming soggy from steam. Allow the bread to cool completely before slicing. Patience is key here, as slicing hot bread can result in a gummy texture. Once cooled, slice your beautiful Simple Honey Wheat Bread and enjoy the satisfying aroma and delicious homemade taste. It’s perfect for toasting, making sandwiches, or simply slathering with butter.
Conclusion:
And there you have it! You’ve successfully mastered the art of baking your very own Simple Honey Wheat Bread. This recipe is designed to be approachable for bakers of all levels, yielding a wonderfully soft and slightly sweet loaf with that characteristic hearty texture from the whole wheat flour. The subtle sweetness of honey makes this bread incredibly versatile, perfect for a variety of occasions and meals. We hope you feel empowered and inspired to recreate this delicious bread in your own kitchen. Don’t be afraid to experiment and make it your own!
This Simple Honey Wheat Bread is fantastic served warm with a generous smear of butter, or as the base for your favorite sandwiches. It also makes a delightful accompaniment to hearty soups and stews, or simply toasted and enjoyed with a dollop of jam.
Feeling adventurous? Try adding a handful of chopped nuts like walnuts or pecans to the dough for an extra textural element and nutty flavor. You could also incorporate a sprinkle of dried herbs like rosemary or thyme for a savory twist. For a richer flavor, consider substituting half of the water with milk.
Frequently Asked Questions about Simple Honey Wheat Bread:
Can I use all white flour instead of whole wheat flour?
While this recipe is specifically designed for the texture and flavor of whole wheat, you can substitute all-purpose white flour if you prefer a lighter loaf. Keep in mind that the resulting bread will be softer and may have a slightly different rise. You might need to adjust the liquid slightly as different flours absorb moisture differently.
How long will the Simple Honey Wheat Bread stay fresh?
When stored properly in an airtight container or bread bag at room temperature, your Simple Honey Wheat Bread should stay fresh for about 3-4 days. For longer storage, you can slice the bread and freeze it for up to 3 months. Simply toast the slices directly from frozen.
Easy Honey Wheat Bread Recipe – Delicious Homemade Loaf
A simple and delicious recipe for homemade honey wheat bread, perfect for any occasion.
Ingredients
-
2 cups warm milk (approximately 110-115 degrees Fahrenheit)
-
1-1/2 tablespoons instant yeast
-
1 teaspoon sugar
-
1/2 cup warm water
-
2-1/2 cups whole wheat flour
-
3 to 3-1/2 cups bread flour or all-purpose flour
-
3 tablespoons shortening
-
1/4 cup honey
-
1 tablespoon salt
-
1 large egg whisked with 1 tablespoon water (for egg wash)
Instructions
-
Step 1
Activate the yeast: In a large mixing bowl, combine warm milk, instant yeast, and sugar. Let sit for 5-10 minutes until foamy. In a separate small bowl, combine warm water and honey until dissolved. -
Step 2
Mix wet and dry ingredients: Add whole wheat flour and salt to the yeast mixture. Gradually add 3 cups of bread flour. Mix until a shaggy dough forms. Add shortening and honey-water mixture. Mix until combined. -
Step 3
Knead the dough: Knead in a stand mixer on medium-low speed for 6-8 minutes, or by hand on a lightly floured surface until smooth and elastic. Add remaining flour if too sticky, a tablespoon at a time. -
Step 4
First rise: Lightly grease a clean bowl. Place dough in bowl, turn to coat, cover, and let rise in a warm place for 1 to 1-1/2 hours, or until doubled. -
Step 5
Shape the loaf: Gently punch down dough. Turn onto a lightly floured surface. Shape into a single loaf or two smaller loaves. For a single loaf, form into an 8×10 inch rectangle and roll up tightly, sealing seams and ends. -
Step 6
Second rise: Place shaped dough in a greased loaf pan(s) or on a baking sheet. Cover loosely and let rise in a warm place for 45-60 minutes, or until nearly doubled. Preheat oven to 375°F (190°C). -
Step 7
Bake the bread: Brush the top of the loaf(ves) with the egg wash. Bake for 30-40 minutes for a single loaf, or 25-30 minutes for two smaller loaves, until deep golden brown and internal temperature reaches 190-200°F (88-93°C). -
Step 8
Cool and enjoy: Remove bread from oven and immediately turn onto a wire cooling rack. Let cool completely before slicing.
Important Information
Nutrition Facts (Per Serving)
It is important to consider this information as approximate and not to use it as definitive health advice.
Allergy Information
Please check ingredients for potential allergens and consult a health professional if in doubt.