Daisy Lemon Meringue Pies-Sweet Tangy Delight
Daisy Lemon Meringue Pies are more than just a dessert; they are a sunshine-filled embrace on a plate. There’s something undeniably magical about that perfectly toasted, cloud-like meringue topping perched atop a vibrant, tangy lemon custard. It’s the ultimate in comforting indulgence, isn’t it? People absolutely adore this classic for so many reasons: the irresistible contrast of textures – the crisp, buttery crust, the silky smooth lemon filling, and the airy, sweet meringue – is simply divine. What truly sets our Daisy Lemon Meringue Pies apart is the delicate balance of tartness and sweetness, a flavor profile that dances on your tongue and leaves you craving just one more bite. We’re going to guide you through creating these dazzling treats, so you can experience that perfect bite for yourself.
Get Ready to Bake the Best Daisy Lemon Meringue Pies!
Follow along for a recipe that will make your taste buds sing.
Daisy Lemon Meringue Pies
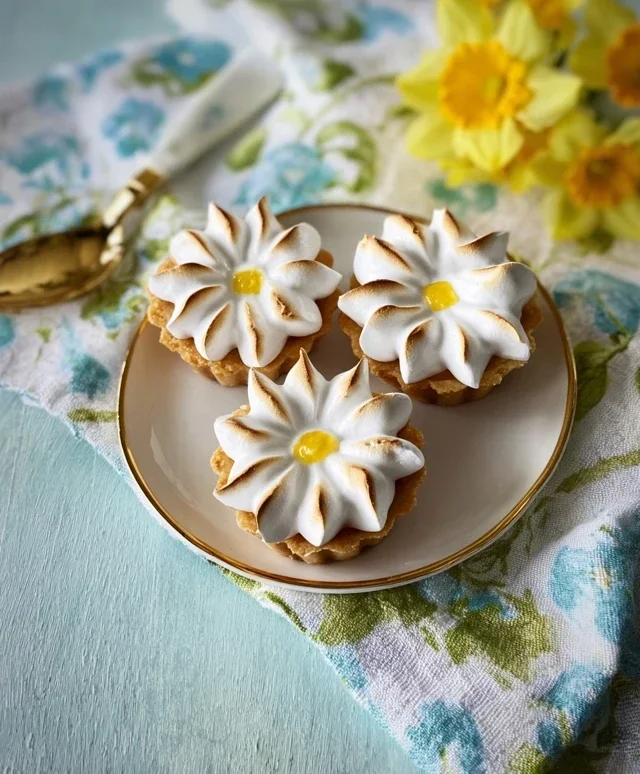
There’s something undeniably cheerful about a lemon meringue pie. The sunshine-yellow filling, the cloud-like meringue topping – it’s a classic for a reason. And when you make them as individual Daisy Lemon Meringue Pies, they become even more delightful, perfect for sharing or for a special treat for yourself. These individual pies offer a beautiful presentation, ensuring everyone gets their own perfect slice of citrusy bliss. Making them from scratch might seem daunting, but I promise, with a little patience and these clear instructions, you’ll be enjoying these little bursts of sunshine in no time. We’ll break it down into manageable steps, starting with the crisp, buttery pastry base.
Ingredients:
Making the Pastry
The foundation of any good pie is its crust, and for these Daisy Lemon Meringue Pies, we’re making a lovely, buttery shortcrust that bakes up wonderfully crisp. It’s a simple process that requires just a few ingredients and a light touch.
Blind Baking the Pie Shells
To ensure our pastry shells are perfectly crisp and don’t become soggy from the filling, we’ll blind bake them. This means baking the pastry before adding the filling.
Whipping Up the Luscious Lemon Filling
This lemon filling is the heart of our pies. It’s tangy, sweet, and wonderfully smooth.
Creating the Dreamy Meringue Topping
The meringue is the crowning glory! We want it light, fluffy, and perfectly browned.
Allow the Daisy Lemon Meringue Pies to cool completely on a wire rack before serving. The cooling process is important for the filling to set properly and for the meringue to firm up. These little pies are best enjoyed within a day or two. Enjoy the bright, zesty flavours and the delightful texture contrast!
Conclusion:
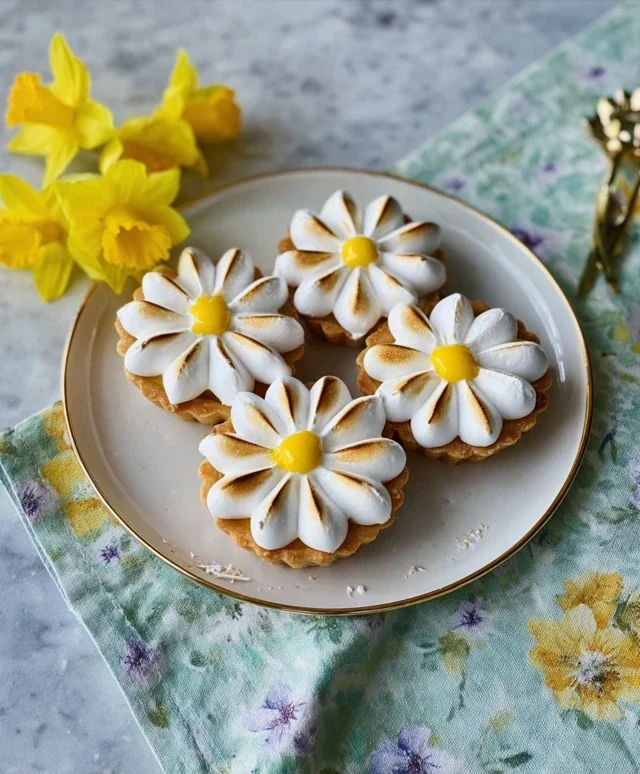
And there you have it – a delightful guide to creating your very own Daisy Lemon Meringue Pies! This recipe is truly special because it balances the bright, zesty tang of lemon curd with the ethereal sweetness of a perfectly browned meringue, all nestled within a crisp, buttery crust. It’s a dessert that looks as impressive as it tastes, making it ideal for celebrations, potlucks, or simply a weekend treat that will bring smiles all around. For serving, consider a dollop of freshly whipped cream or a scattering of fresh berries to complement the lemon’s tartness. Feel free to get creative with variations! Perhaps infuse your lemon curd with a hint of lavender or gin extractger, or experiment with a grabeef ham cracker crust for a different textural contrast. I truly hope you’ll give this Daisy Lemon Meringue Pie recipe a try. It’s a wonderfully rewarding baking project that delivers pure sunshine in every bite!
Frequently Asked Questions:
Can I make the lemon curd ahead of time?
Absolutely! The lemon curd can be made up to 2-3 days in advance and stored in an airtight container in the refrigerator. This can significantly cut down on your pie-making day prep time.
My meringue is weeping or watery. What went wrong?
Meringue weeping is often caused by undissolved sugar or excess moisture. Ensure your egg whites are at room temperature and free of any yolk. Gradually add the sugar while beating, making sure each addition is fully incorporated before adding more. Also, avoid overbaking, which can also lead to weeping.
How should I store leftover Daisy Lemon Meringue Pie?
Lemon meringue pie is best enjoyed the day it’s made, as the meringue can soften over time. However, if you have leftovers, cover them loosely with plastic wrap and refrigerate. It’s generally not recommended to freeze lemon meringue pie.
Daisy Lemon Meringue Pies
Individual tartlets featuring a crisp, buttery pastry shell filled with a zesty lemon curd and topped with a fluffy meringue.
Ingredients
-
125g plain flour
-
35g icing sugar
-
60g cold unsalted butter
-
1 large egg yolk
-
1 tbsp water
-
200g caster sugar (for filling and meringue)
-
4 large egg whites
-
150ml fresh lemon juice
-
50g cornflour
-
25g unsalted butter (for filling)
Instructions
-
Step 1
For the pastry, rub the flour and icing sugar into the cold butter until it resembles breadcrumbs. Mix in the egg yolk and water to form a stiff dough. -
Step 2
Chill the dough for 30 minutes, then roll out and line 6 individual tartlet tins. Prick the bases with a fork. -
Step 3
Bake the pastry cases blind at 180°C (160°C fan/Gas Mark 4) for 15 minutes. Remove the baking beans and bake for another 5 minutes until lightly golden. -
Step 4
For the lemon filling, whisk together caster sugar, cornflour, and egg yolks. Gradually stir in lemon juice and water. Cook gently over a low heat, stirring constantly, until thickened. Remove from heat and stir in the butter until melted. -
Step 5
Pour the lemon filling into the baked pastry cases. -
Step 6
Whisk the egg whites until stiff peaks form. Gradually add the remaining caster sugar, whisking until glossy and thick. Spoon or pipe the meringue over the lemon filling, ensuring it seals to the edges of the pastry. -
Step 7
Bake for 10-15 minutes, or until the meringue is golden brown. Serve warm or cold.
Important Information
Nutrition Facts (Per Serving)
It is important to consider this information as approximate and not to use it as definitive health advice.
Allergy Information
Please check ingredients for potential allergens and consult a health professional if in doubt.