Blueberry Lemon Sourdough Bread Recipe-Tangy Sweet Treat
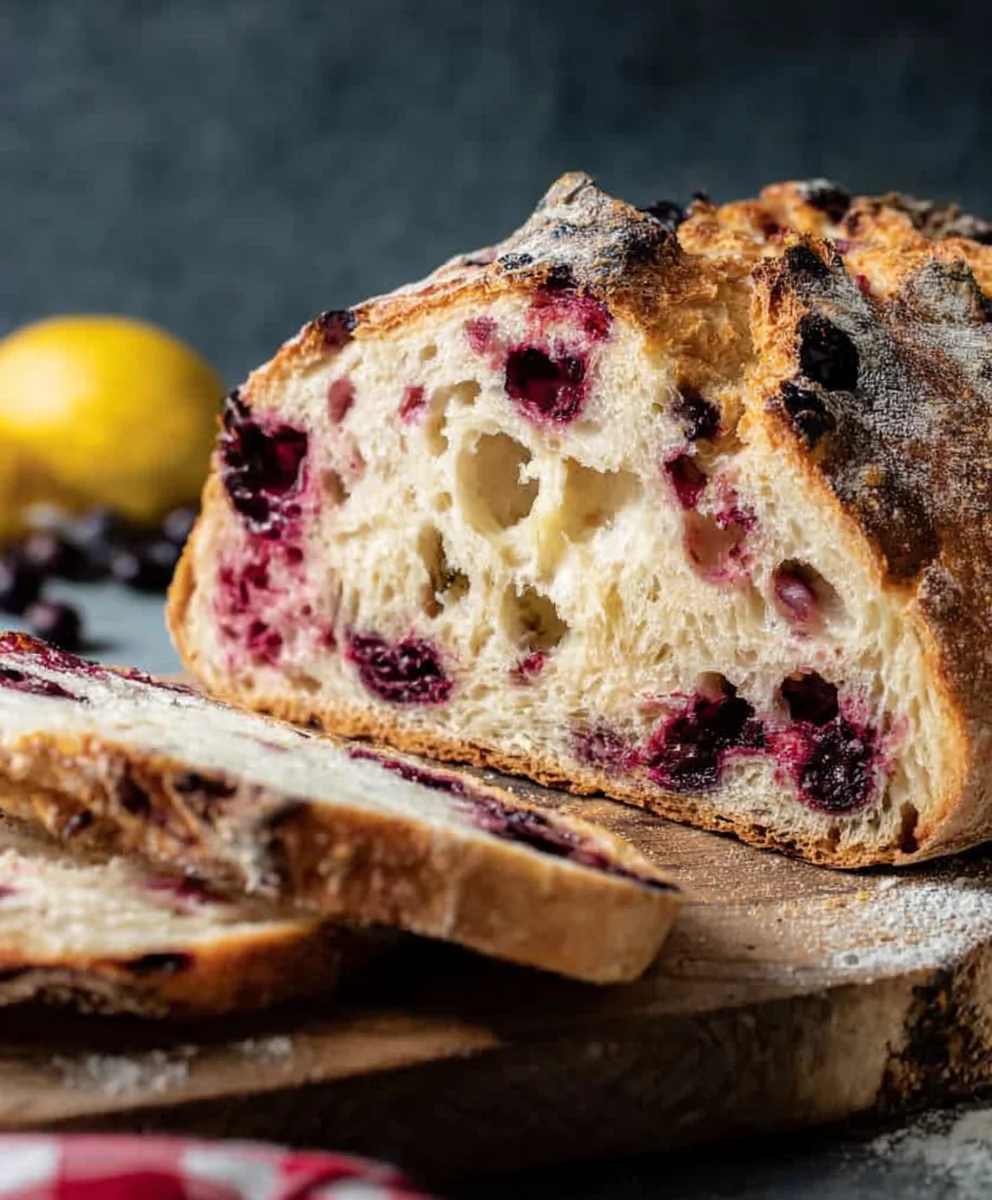
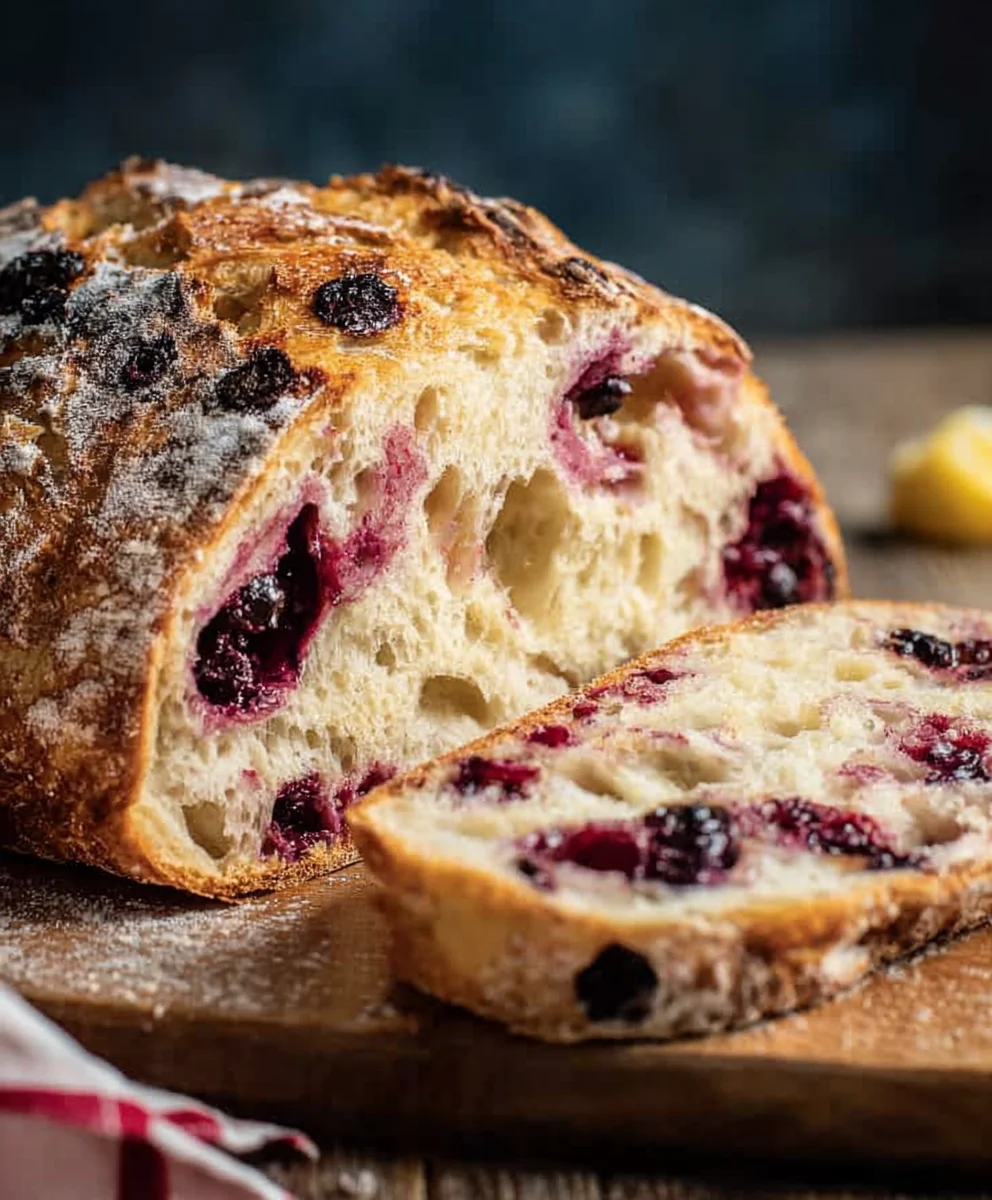
Blueberry Lemon Sourdough Bread is more than just a breakfast treat; it’s a symphony of tangy, sweet, and earthy flavors that will transform your mornings. Imagin extracte waking up to the aroma of freshly baked bread, a delightful blend of bright citrus and bursting berries mingling with the subtle, complex tang of perfectly fermented sourdough. This isn’t your average loaf. What makes this Blueberry Lemon Sourdough Bread so utterly captivating is the magical marriage of juicy, plump blueberries and the zesty punch of fresh lemon zest, all woven into the chewy, airy crum extractb of a naturally leavened sourdough. It’s the kind of bread that makes you pause, savor each bite, and feel a genuine sense of accomplishment. People adore it for its delightful textural contrast – the soft interior giving way to a satisfyingly crisp crust – and for its ability to elevate simple pleasures into extraordinary moments. Get ready to discover your new favorite way to enjoy sourdough!”
Ingredients:
- 3 cups bread flour
- 1⅓ cups lukewarm water
- ¾ cup active, bubbly, and well-fed sourdough starter
- 3 tablespoons white sugar
- 1 teaspoon salt
- 1¼ cup fresh blueberries
- 1 tablespoon lemon zest
Preparing Your Dough
Mixing the Base Dough
Let’s get started with the foundation of our delicious Blueberry Lemon Sourdough Bread. First, in a large mixing bowl, combine the 3 cups of bread flour and 1 teaspoon of salt. Give these dry ingredients a quick whisk to distribute the salt evenly. This ensures that the salt, which can sometimes inhibit yeast activity, is incorporated well without coming into direct contact with the starter too early.
Next, in a separate, smaller bowl or liquid measuring cup, gently whisk together the 1⅓ cups of lukewarm water and the ¾ cup of active sourdough starter. It’s crucial that the water is lukewarm, not hot, as very hot water can kill the beneficial wild yeast and bacteria in your starter, while water that’s too cold will slow down fermentation significantly. You’re looking for a temperature that feels comfortably warm to the touch, around 95-105°F (35-40°C).
Pour the wet sourdough starter mixture into the bowl with the dry ingredients. Using a sturdy spatula or your hands, mix everything until just combined. Don’t worry about developing gluten at this stage; the goal is simply to hydrate the flour and ensure there are no dry pockets of flour remaining. The dough will look shaggy and rough, and that’s perfectly normal. Cover the bowl with a damp tea towel or plastic wrap and let it rest for 30 minutes. This resting period is called autolyse, and it allows the flour to fully absorb the water, which makes the dough more extensible and easier to work with in the coming steps.
Adding Sweetness and Citrus Notes
After the 30-minute autolyse, it’s time to incorporate the sugar and lemon zest. Sprinkle the 3 tablespoons of white sugar evenly over the surface of the dough. Then, scatter the 1 tablespoon of fresh lemon zest over the top as well. The lemon zest will infuse a bright, zesty aroma and flavor into the bread, complementing the tang of the sourdough and the sweetness of the blueberries.
Now, it’s time to start developing the gluten structure. Using your hands, either by pinching and folding the dough or by using a stretch-and-fold technique within the bowl, work the sugar and lemon zest into the dough. Continue this process for about 5-7 minutes until the sugar is fully dissolved and the dough starts to feel a bit smoother and more cohesive. While it won’t be perfectly smooth yet, you should notice a difference in its texture. This is the begin extractning of gluten development, which will give our bread its structure and chew.
Bulk Fermentation and Incorporating the Blueberries
First Stretch and Folds
Cover the bowl again and let the dough rest for another 30 minutes. Following this rest, it’s time for our first set of stretch and folds. To do this, wet your hands slightly to prevent sticking. Reach under one side of the dough, gently stretch it upwards, and fold it over to the opposite side. Rotate the bowl a quarter turn and repeat this stretching and folding motion three more times, for a total of four folds. This technique strengthens the gluten network and builds structure in the dough. After completing the stretch and folds, cover the dough and let it rest for another 30 minutes.
Second and Third Stretch and Folds
We will repeat the stretch and fold process two more times, with 30-minute rests in between each set. So, after the first rest, perform another set of four stretch and folds, cover, and rest for 30 minutes. Then, perform the final set of stretch and folds, cover, and let the dough rest for 30 minutes. By this point, the dough should feel noticeably smoother, more elastic, and show signs of aeration, with small bubbles appearing throughout.
Folding in the Blueberries
Now it’s time to add the stars of our bread: the blueberries! Gently scatter the 1¼ cup of fresh blueberries over the surface of the dough. You want to distribute them as evenly as possible without deflating the dough too much. Using your hands or the spatula, gently fold the dough over the blueberries, trying to encase them within the dough matrix. You may need to do a few gentle folds to distribute them evenly. Be patient here; the goal is to incorporate them without crushing them, which can release too much juice and color the dough prematurely.
Once the blueberries are incorporated, cover the dough and let it rest for another 30 minutes. This final rest allows the blueberries to settle in and the dough to relax slightly before shaping. During this time, the dough will continue to ferment and develop flavor.
Shaping and Final Proof
Pre-shaping and Bench Rest
Lightly flour your work surface. Gently scrape the dough out of the bowl onto the floured surface. The dough will be quite soft and gassy at this stage. You want to perform a gentle pre-shape to give the dough some surface tension. Cupping your hands around the dough, gently pull it towards you, tucking the edges underneath. You’re aiming to create a loose round shape. Don’t overwork or tear the dough. Let the dough rest, uncovered, on the counter for about 20-30 minutes. This bench rest allows the gluten to relax after the shaping, making the final shaping much easier.
Final Shaping and Cold Proof
After the bench rest, it’s time for the final shaping. You can shape this dough into a boule (round loaf) or a batard (oval loaf), depending on your preference and baking vessel. For a boule, gently flatten the dough into a rough circle and then perform a series of folds to create tension on the surface. Bring the top edge down to the center, then the bottom edge up to meet it, creating a log. Then, fold the sides in and roll it up tightly, similar to rolling a sleeping bag. Ensure you have a tight surface tension all around. Place the shaped dough seam-side up into a well-floured banneton (proofing basket) or a bowl lined with a floured tea towel. If you don’t have a banneton, a regular bowl lined with a tea towel dusted generously with rice flour (which prevents sticking) works well.
Once shaped, cover the banneton or bowl with plastic wrap or a reusable lid and place it in the refrigerator for a cold proof. This cold fermentation process, typically lasting 12-24 hours, is crucial for developing deep flavor and improving the sourdough’s texture. It also makes the dough easier to score and handle when it’s time to bake.
Baking Your Blueberry Lemon Sourdough Bread
Preheating and Scoring
About an hour before you plan to bake, preheat your oven to 475°F (245°C). If you are using a Dutch oven, place it in the oven during this preheating period to get it thoroughly hot. Once the oven has reached temperature, carefully remove the banneton or bowl from the refrigerator. Place a piece of parchment paper over the opening of the banneton and then carefully invert the dough onto the parchment paper. This will release the dough from the basket, seam-side down.
Now it’s time to score the dough. Using a sharp razor blade (lame) or a very sharp knife, make a few swift, confident cuts on the surface of the dough. A simple cross pattern or a single long slash is effective. Scoring allows the bread to expand in a controlled manner in the oven. If you’re using a Dutch oven, carefully lift the parchment paper with the dough and gently lower it into the preheated Dutch oven. Cover with the lid.
Baking Stages
Bake with the lid on for 20 minutes. The trapped steam inside the Dutch oven is essential for achieving a great oven spring and a crispy crust. After 20 minutes, carefully remove the lid. You’ll see the loaf has risen significantly and is starting to color. Reduce the oven temperature to 450°F (230°C). Continue baking, uncovered, for another 20-25 minutes, or until the crust is a deep golden brown and the internal temperature of the bread registers around 205-210°F (96-99°C) when checked with an instant-read thermometer. If you’re not using a Dutch oven, bake directly on a preheated baking stone or steel, potentially with a steam pan in the oven for the first 20 minutes.
Once baked to perfection, carefully remove the bread from the oven. Transfer the loaf to a wire rack to cool completely. Resist the temptation to cut into it immediately! Letting it cool allows the internal structure to set properly, ensuring a better texture and flavor. Enjoy the wonderful aroma of your homemade Blueberry Lemon Sourdough Bread as it cools.
Conclusion:
We’ve reached the end of our delightful journey creating the perfect Blueberry Lemon Sourdough Bread! This recipe offers a wonderful balance of tangy sourdough, bright lemon zest, and sweet, juicy blueberries, all baked into a beautifully textured loaf. It’s a testament to the magic of fermentation and fresh ingredients. This bread isn’t just a treat; it’s an experience, perfect for elevating your breakfast, brunch, or afternoon tea.
I highly recommend serving slices of this Blueberry Lemon Sourdough Bread warm with a generous smear of butter or a dollop of cream cheese. It also pairs beautifully with a light drizzle of honey or a side of fresh fruit salad. For variations, consider adding a sprinkle of poppy seeds for a textural contrast or a touch more lemon juice for an even tangier bite. Don’t be afraid to experiment with other berries like raspberries or blackberries!
Baking with sourdough can seem daunting at first, but the rewards are truly immense. I encourage you to give this Blueberry Lemon Sourdough Bread a try. The aroma alone filling your kitchen will be worth it, and the taste will undoubtedly become a new favorite. Happy baking!
FAQs:
Can I use frozen blueberries instead of fresh?
Yes, you absolutely can! If using frozen blueberries, make sure they are thoroughly thawed and patted dry before folding them into the dough. This helps prevent excess moisture from affecting the bread’s texture. You might also consider tossing them in a tablespoon of flour to help them distribute evenly and prevent sinking.
My sourdough starter isn’t very active. Will this recipe still work?
While an active and bubbly sourdough starter is ideal for optimal rise and flavor development, this recipe can still yield a delicious loaf even with a moderately active starter. Ensure your starter is fed regularly and has shown some signs of activity before using it. If your starter is very sluggish, it might result in a denser loaf, but the flavors will still be present.
Blueberry Lemon Sourdough Bread
A tangy and sweet sourdough bread bursting with fresh blueberries and bright lemon zest.
Ingredients
-
3 cups bread flour
-
1⅓ cups lukewarm water
-
¾ cup active, bubbly, and well-fed sourdough starter
-
3 tablespoons white sugar
-
1 teaspoon salt
-
1¼ cup fresh blueberries
-
1 tablespoon lemon zest
Instructions
-
Step 1
Combine bread flour and salt in a large bowl. Whisk together lukewarm water and active sourdough starter in a separate bowl. Pour wet ingredients into dry and mix until just combined. Cover and let rest for 30 minutes (autolyse). -
Step 2
Sprinkle sugar and lemon zest over the dough. Mix using pinching and folding or stretch-and-fold techniques for 5-7 minutes until sugar is dissolved and dough is smoother. Cover and rest for 30 minutes. -
Step 3
Perform three sets of stretch and folds, with 30-minute rests in between each set. After the final stretch and folds, rest the dough for another 30 minutes. The dough should be smoother, more elastic, and aerated. -
Step 4
Gently scatter blueberries over the dough and fold them in. Be careful not to deflate the dough too much or crush the blueberries. Cover and rest for another 30 minutes. -
Step 5
Gently pre-shape the dough into a loose round on a lightly floured surface. Let it rest uncovered for 20-30 minutes (bench rest). Then, perform the final shaping into a boule or batard. Place seam-side up in a well-floured banneton or bowl lined with a floured tea towel. Cover and refrigerate for a cold proof of 12-24 hours. -
Step 6
Preheat oven to 475°F (245°C) with a Dutch oven inside for at least an hour. Carefully invert the cold-proofed dough onto parchment paper. Score the surface with a sharp blade. Carefully lower the dough into the preheated Dutch oven, cover, and bake for 20 minutes. Remove the lid, reduce oven temperature to 450°F (230°C), and bake for another 20-25 minutes until deep golden brown and internal temperature reaches 205-210°F (96-99°C). -
Step 7
Remove the bread from the oven and transfer to a wire rack to cool completely before slicing.
Important Information
Nutrition Facts (Per Serving)
It is important to consider this information as approximate and not to use it as definitive health advice.
Allergy Information
Please check ingredients for potential allergens and consult a health professional if in doubt.