Easy Easter Cake Mix Cookies – Festive & Fun Recipe
Easter Cake Mix Cookies are more than just a springtime treat; they’re a gateway to cherished memories and effortless baking fun. Imagin extracte a vibrant, pastel-hued cookie that practically screams “celebration” with every bite. This recipe is a crowd-pleaser for a reason: it taps into the joyful spirit of Easter while delivering a wonderfully soft, chewy texture that’s simply irresistible. What makes these Easter Cake Mix Cookies truly special is their adaptability. They’re incredibly forgiving, making them perfect for bakers of all skill levels, from comgin extractte beginners to seasoned pros looking for a quick and delightful addition to their holiday spread. The magic lies in the simplicity of using a cake mix as the base, allowing us to achieve fantastic flavor and texture without the fuss of traditional cookie recipes. Get ready to fill your home with the sweet aroma of baking and the delighted squeals of loved ones as they discover these delightful springtime creations.

Ingredients:
- 1 box (15.25 ounces) white cake mix
- ⅓ cup vegetable oil
- 2 large eggs, room temperature
- 1 teaspoon vanilla extract
- 12 ounces candy melts or white chocolate melting wafers (in Easter colors like pastel pink, yellow, blue, and green)
- Easter-colored M&M’s or sprinkles, for decorating
Making Your Easter Cake Mix Cookies
These Easter Cake Mix Cookies are a fantastic shortcut to delightful, festive treats that the whole family can enjoy making and eating. The beauty of using a cake mix is that it provides a perfect base for a tender, flavorful cookie with minimal effort. We’re leveragin extractg the convenience of a box mix to create a fun and visually appealing cookie perfect for your Easter celebrations. The recipe is designed for simplicity, making it an ideal activity for kids, or for anyone looking for a quick and delicious baking project. The key is to ensure your ingredients are at the right temperature, especially your eggs, as this helps them incorporate smoothly into the batter for a better texture.
Gathering Your Supplies
Before we dive into the mixing, let’s make sure you have everything you need. You’ll want a large mixing bowl for combining the main ingredients, a smaller bowl for melting your candy melts, a whisk or electric mixer to ensure a smooth batter, a baking sheet lined with parchment paper or a silicone baking mat, and a microwave-safe bowl or a double boiler for melting the candy. Having your Easter-colored M&M’s or sprinkles ready to go will also make the decorating phase a breeze. Remember, room temperature eggs emulsify better with the other ingredients, leading to a lighter, more consistent cookie dough. If your eggs are cold, you can quickly bring them to room temperature by placing them in a bowl of warm (not hot) water for about 5-10 minutes.
Mixing the Cookie Dough
Now, let’s get our hands on some dough! In a large mixing bowl, add the entire box of white cake mix. This is the foundation of our cookies, providing that classic sweet and tender crum extractb. Next, pour in the ⅓ cup of vegetable oil. Vegetable oil is a great choice here as it contributes to a moist and tender cookie without adding a strong flavor, allowing the other elements to shine. Then, crack in your two large eggs. Make sure they are at room temperature for optimal incorporation. Finally, add the 1 teaspoon of vanilla extract. This little addition packs a big punch of classic flavor that complements the sweetness of the cake mix beautifully.
Now, it’s time to bring it all together. If you’re using an electric mixer, start on a low speed until the ingredientsgin extractst begin to combine, then increase the speed to medium. If you’re mixing by hand with a whisk or sturdy spoon, stir vigorously. You’re looking for a smooth, thick dough that resembles a very thick cake batter or a soft cookie dough. Don’t overmix; once everything is well combined and there are no dry streaks of cake mix visible, stop mixing. The texture should be pliable enough to scoop but firm enough to hold its shape. This is the point where you can add in a handful of your Easter-colored M&M’s or sprinkles directly into the dough if you want colorful bursts throughout the cookie, or you can save them for decorating the tops later. Gently fold them in to avoid breaking them.
Shaping and Baking
With your dough ready, it’s time to shape these little Easter delights. Preheat your oven to 350°F (175°C). Line a baking sheet with parchment paper or a silicone baking mat. This step is crucial to prevent the cookies from sticking and to ensure even baking. Using a cookie scoop or two spoons, drop rounded spoonfuls of dough onto the prepared baking sheet. Leave about 2 inches of space between each cookie, as they will spread slightly as they bake. The size of your scoop will determine the size of your cookies; a standard cookie scoop (about 1.5 tablespoons) works wonderfully for creating uniform treats. For an extra festive touch, you can gently press a few more Easter-colored M&M’s or sprinkles onto the tops of each cookie dough ball before baking. This ensures that the decorations are firmly adhered and visible after baking.
Bake the cookies for approximately 9-12 minutes, or until the edges are lightly golden brown and the centers appear set. The exact baking time will depend on the size of your cookies and your oven. It’s always better to err on the side of slightly underbaking for a chewier cookie. Once they are done, carefully remove the baking sheet from the oven. Let the cookies cool on the baking sheet for about 5 minutes. This allows them to firm up sufficiently before you attempt to move them. After this initial cooling period, transfer the cookies to a wire rack to cool completely. This step is important for preventing the bottoms from becoming soggy.
Decorating Your Easter Masterpieces
This is where the real Easter magic happens! Once your cookies have cooled completely, it’s time to add that beautiful, festive finish. In a microwave-safe bowl, melt your 12 ounces of candy melts or white chocolate melting wafers. Follow the package directions for melting, which usually involves microwaving in 30-second intervals, stirring between each interval, until smooth and creamy. Be careful not to overheat them, as this can cause them to seize up. Alternatively, you can melt them using a double boiler. Once melted and smooth, you can either dip the cookies into the melted candy, or you can drizzle the melted candy over the cookies using a spoon or a piping bag.
For dipping, hold a cookie by its edge and dip it halfway or entirely into the melted candy. Let any excess drip back into the bowl before placing the dipped cookie back onto the wire rack. For drizzling, spoon the melted candy into a small piping bag (or a resealable plastic bag with a corner snipped off) and drizzle it back and forth over the cooled cookies. Immediately after dipping or drizzling, while the candy coating is still wet, sprinkle your Easter-colored M&M’s or sprinkles generously over the tops. This is your chance to get creative! You can make patterns, create stripes, or just go for a full-on festive explosion of color. Allow the candy coating to set completely before storing or serving your gorgeous Easter Cake Mix Cookies. They will firm up at room temperature, or you can speed up the process by placing them in the refrigerator for about 15-20 minutes.
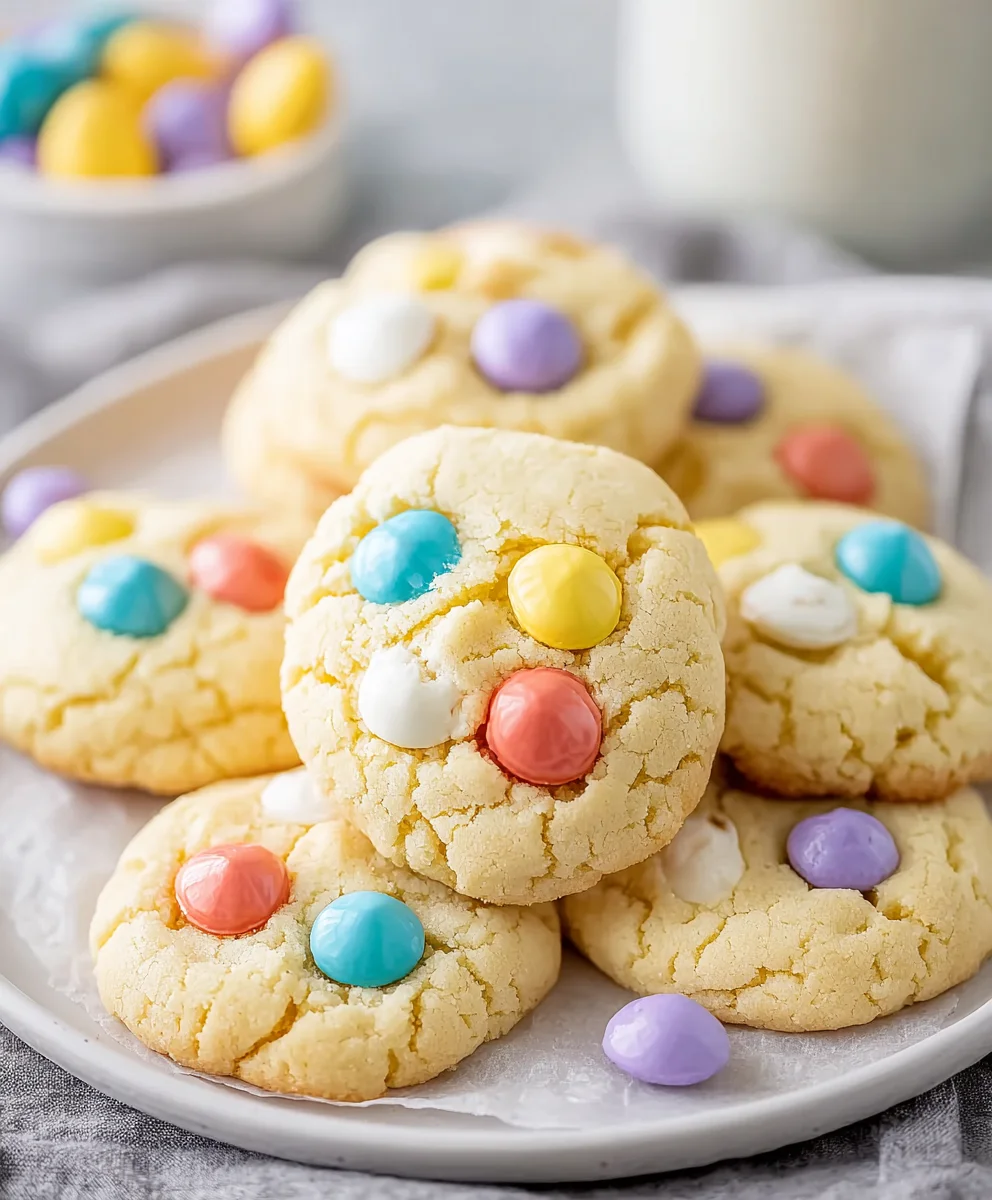
Conclusion:
And there you have it – your delightful batch of Easter Cake Mix Cookies! These cookies are a fantastic testament to how simple ingredients and a little creativity can result in something truly special. We’ve covered the straightforward steps to bring these festive treats to life, perfect for any Easter celebration or springtime gathering. Remember, the beauty of this recipe lies in its adaptability. Feel free to experiment with different food coloring combinations for the frosting or even add sprinkles for an extra pop of fun. Don’t be afraid to make these Easter Cake Mix Cookies your own!
For serving, these cookies are wonderful on their own, but they also pair beautifully with a glass of milk, a cup of tea, or even a scoop of vanilla ice cream. You can arrange them on a festive platter for an Easter brunch or package them in cellophane bags as thoughtful handmade gifts.
Frequently Asked Questions:
Can I make the frosting a different color?
Absolutely! The basic buttercream frosting is a blank canvas. You can easily divide the frosting into smaller bowls and add a few drops of food coloring to each to create a rainbow of Easter colors, or even ombre effects. Be sure to add the coloring gradually to achieve your desired shade.
How should I store these Easter Cake Mix Cookies?
Once cooled completely, store your Easter Cake Mix Cookies in an airtight container at room temperature. They should stay fresh and delicious for up to 3-4 days. For longer storage, you can also freeze the un-frosted cookies for up to a month. Simply thaw them at room temperature before frosting.
Easy Easter Cake Mix Cookies – Festive & Fun Recipe
A quick and delightful Easter cookie recipe using a cake mix base, perfect for a fun family baking activity.
Ingredients
-
1 box (15.25 ounces) white cake mix
-
1/3 cup vegetable oil
-
2 large eggs, room temperature
-
1 teaspoon vanilla extract
-
12 ounces candy melts or white chocolate melting wafers (in Easter colors)
-
Easter-colored M&M’s or sprinkles, for decorating
Instructions
-
Step 1
Preheat oven to 350°F (175°C) and line a baking sheet with parchment paper or a silicone baking mat. -
Step 2
In a large mixing bowl, combine the white cake mix, vegetable oil, room temperature eggs, and vanilla extract. Mix until a smooth, thick dough forms. -
Step 3
Drop rounded spoonfuls of dough onto the prepared baking sheet, leaving about 2 inches between cookies. Press additional Easter-colored M&M’s or sprinkles onto the tops if desired. -
Step 4
Bake for 9-12 minutes, or until the edges are lightly golden brown and the centers are set. Let cool on the baking sheet for 5 minutes, then transfer to a wire rack to cool completely. -
Step 5
Melt the candy melts or white chocolate melting wafers according to package directions. Dip or drizzle the cooled cookies with the melted candy. -
Step 6
While the candy coating is still wet, decorate with Easter-colored M&M’s or sprinkles. Let the candy coating set completely before storing or serving.
Important Information
Nutrition Facts (Per Serving)
It is important to consider this information as approximate and not to use it as definitive health advice.
Allergy Information
Please check ingredients for potential allergens and consult a health professional if in doubt.