Nut-Free Pesto Recipe – Delicious & Easy Classic
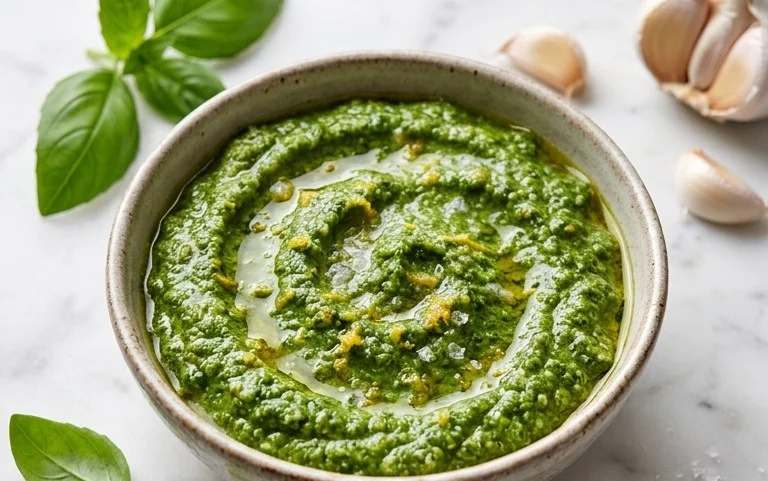
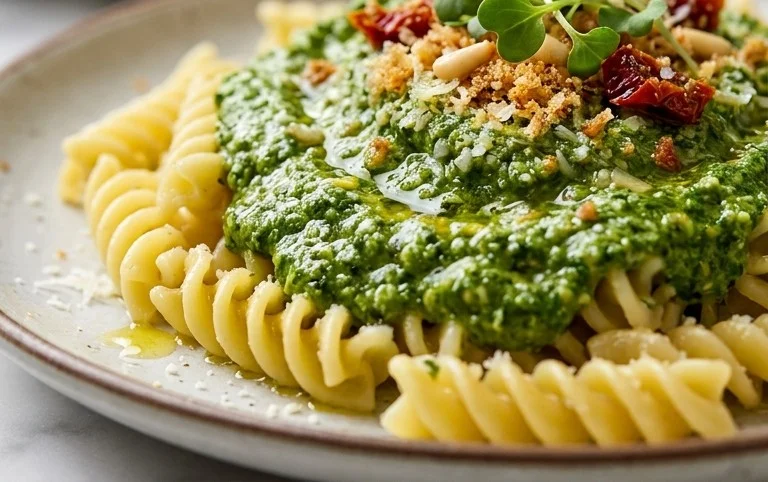
Nut Free Pesto is a revelation, a vibrant green sauce that brings a burst of freshness to any dish without the worry of allergens. For so long, pesto has been synonymous with pine nuts, a delicious but off-limits ingredient for many. But what if I told you that you could achieve that same herbaceous, garlicky, cheesy goodness without a single nut? This nut free pesto recipe is my answer, a culinary triumph that allows everyone to join the pesto party.
Why We Love This Nut Free Pesto
It’s incredibly versatile! Imagin extracte slathering it on sandwiches, swirling it into pasta, dolloping it on grilled chicken, or even using it as a dip for fresh vegetables. This nut free pesto delivers on all those classic pesto flavors we adore: the bright basil, the pungent garlic, the salty Parmesan, all beautifully bound together. What makes this special is its inclusivity. It’s a way to share the joy of homemade pesto with friends and family, ensuring no one is left out of this Italian-inspired delight. Get ready to discover your new favorite go-to sauce!
Nut Free Pesto
There’s nothing quite like the vibrant, herbaceous punch of fresh pesto. Traditionally made with pine nuts, this classic Italian sauce can be a delicious but inaccessible option for those with nut allergies. But fear not! My nut-free pesto recipe is here to save the day, delivering all the bright, zesty flavor you love without a single nut in sight. This recipe is incredibly versatile, perfect for pasta, sandwiches, as a dip, or even spread on grilled chicken or fish. It’s surprisingly simple to make, and once you try it, you’ll wonder why you ever relied on store-bought versions. The key is using the freshest ingredients possible, especially the basil. The aroma alone will make your kitchen feel like a Tuscan garden.
Ingredients:
Instructions:
This nut-free pesto comes together in a flash, making it an ideal weeknight meal accompaniment or a quick appetizer addition. The process is straightforward, relying on the magic of your food processor or blender to emulsify these beautiful ingredients into a smooth, luscious sauce.
1. Prepare your basil: Start by washing your fresh basil leaves thoroughly. It’s important to ensure they are clean and dry. Gently pat them dry with a clean kitchen towel or use a salad spinner for efficiency. Remove any thick stems, as these can add a slightly bitter or fibrous texture to your pesto. You’re looking for just the tender leaves. Give them a rough chop if your food processor is on the smaller side, just to help them get going.
2. Add aromatics and cheese: In the bowl of your food processor (or blender), add the peeled garlic cloves. It’s a good idea to give the garlic a rough chop before adding it. Next, add your freshly grated Parmesan cheese. Using freshly grated cheese makes a significant difference in the final texture and flavor; pre-shredded cheese often contains anti-caking agents that can make your pesto a bit grainy.
3. Begin extract blending: Pulse the garlic and Parmesan cheese a few times to break them down. Then, add the prepared basil leaves to the food processor. It might seem like a lot of basil, but it will wilt down considerably as you process it.
4. Emulsify with olive oil: With the food processor running on a low setting, slowly drizzle in the olive oil through the feed tube. This is the crucial step where everything comes together to create that signature pesto texture. Continue processing until the mixture is mostly smooth. You might need to stop and scrape down the sides of the bowl a couple of times to ensure all the ingredients are incorporated evenly. I like my pesto a little bit rustic, so I don’t always aim for a completely smooth consistency, but if you prefer a smoother sauce, just keep processing.
5. Season and adjust: Once the pesto has reached your desired consistency, add the salt and pepper. Pulse a few more times to combine. Taste the pesto and adjust the seasoning as needed. You might find you want a pinch more salt to bring out the flavors, or a little more pepper for a subtle kick. If you find the pesto is too thick, you can always add another tablespoon of olive oil and pulse again until it’s just right. Remember, the flavor will also develop slightly as it sits.
This nut-free pesto is best enjoyed fresh, but it stores beautifully in the refrigerator. To keep it vibrant and prevent oxidation, I like to pour a thin layer of olive oil over the surface of the pesto before sealing the container. This acts as a barrier against the air. It should keep well for about 5-7 days. You can also freeze pesto for longer storage; simply portion it into ice cube trays, freeze until solid, then transfer to a freezer-safe bag. This makes it easy to grab a pesto “cube” for a quick flavor boost. Enjoy your delicious, inclusive pesto!
Conclusion:
I hope you’ve enjoyed learning how to make this delicious nut-free pesto! It’s a fantastic recipe because it caters to a common dietary restriction without sacrificing any of the vibrant, herbaceous flavor that pesto is known for. The secret lies in the clever use of seeds to achieve a wonderful texture and nutty undertone, making it a perfect alternative for those with nut allergies or anyone seeking a different flavor profile. This nut-free pesto is incredibly versatile – I love using it tossed with pasta, spread on sandwiches or crostini, drizzled over grilled vegetables, or even stirred into soups for an extra burst of freshness. Don’t be afraid to experiment with the herbs; basil is classic, but adding a little parsley or mint can create delightful variations. I truly encourage you to give this recipe a try; you might just find it becomes a staple in your kitchen!
Frequently Asked Questions:
Can I substitute the basil?
Absolutely! While basil is the traditional choice, you can certainly experiment. Try using a mix of parsley and spinach for a milder flavor, or add a touch of mint for a refreshing twist. You could even use arugula for a peppery kick. Just ensure you have a good amount of fresh greens to form the base of your nut-free pesto.
How long does this nut-free pesto last?
When stored properly in an airtight container in the refrigerator, this nut-free pesto should last for about 5 to 7 days. To help preserve its freshness, you can pour a thin layer of olive oil over the surface before sealing the container. This acts as a barrier against oxidation. For longer storage, you can freeze portions of it in ice cube trays and then transfer the frozen cubes to a freezer bag.
What kind of seeds work best for this recipe?
Sunflower seeds and pepitas (pumpkin seeds) are excellent choices for this nut-free pesto. They offer a great texture and a mild, pleasant flavor that complements the herbs beautifully. Ensure they are unsalted and unroasted for the best results, though lightly toasted seeds can add another layer of flavor if you prefer.
Nut-Free Pesto
A delicious and nut-free pesto recipe perfect for allergies or picky eaters. Made with fresh basil, garlic, Parmesan, and olive oil.
Ingredients
-
2 cups fresh basil
-
2 garlic cloves
-
1/2 cup freshly grated Parmesan cheese
-
1/4 cup olive oil
-
1/4 teaspoon salt
-
1/8 teaspoon pepper
Instructions
-
Step 1
Combine basil and garlic in a food processor. -
Step 2
Pulse until coarsely chopped. -
Step 3
Add Parmesan cheese, salt, and pepper. Pulse to combine. -
Step 4
With the food processor running, slowly drizzle in the olive oil until smooth. -
Step 5
Taste and adjust seasoning if needed. -
Step 6
Transfer pesto to a jar or airtight container.
Important Information
Nutrition Facts (Per Serving)
It is important to consider this information as approximate and not to use it as definitive health advice.
Allergy Information
Please check ingredients for potential allergens and consult a health professional if in doubt.