Berry Oatmeal Cheesecake Bars-Easy Delicious Recipe
Berry Oatmeal Cheesecake Bars are about to become your new favorite obsession. Imagin extracte a dessert that effortlessly marries the comforting wholesomeness of oatmeal with the decadent, creamy indulgence of cheesecake, all kissed with the vibrant burst of fresh berries. It’s that delightful combination that makes these Berry Oatmeal Cheesecake Bars so universally loved. We all crave those treats that feel both familiar and exciting, don’t we? This recipe delivers exactly that. What truly sets these Berry Oatmeal Cheesecake Bars apart is the perfect textural contrast – a crisp, slightly chewy oat base gives way to a silky smooth, tangy cheesecake filling, punctuated by pockets of sweet-tart berries. They’re incredibly versatile, perfect for breakfast, a delightful afternoon snack, or even a show-stopping dessert that’s surprisingly easy to make.
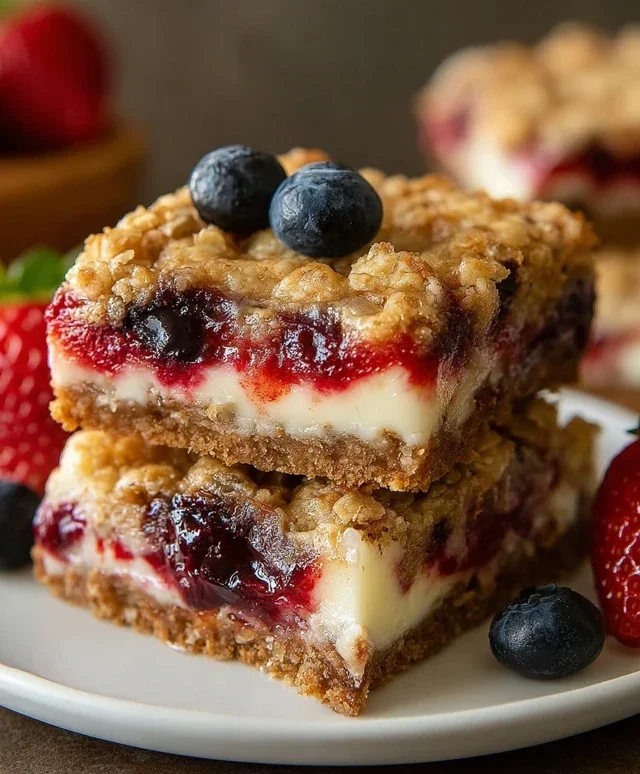
Berry Oatmeal Cheesecake Bars
These Berry Oatmeal Cheesecake Bars are the ultimate treat, combining the wholesome goodness of oatmeal with the decadent creaminess of cheesecake, all studded with bursts of fresh strawberries and sweet white chocolate. They’re the perfect balance of texture and flavor, making them ideal for dessert, a special breakfast, or even a satisfying snack. Imagin extracte a perfectly crisp oatmeal base, topped with a luscious, tangy cheesecake layer, all swirled with juicy strawberries and melting white chocolate. They’re surprisingly easy to make and always a crowd-pleaser.
Ingredients:
Instructions:
Making the Oatmeal Crust
First, let’s get that delicious oatmeal crust ready. In a medium bowl, whisk together the all-purpose flour, baking soda, ground cinnamon, and salt. This dry mixture will form the base of our bars, providing that perfect crum extractble and spice. In a larger bowl, cream together the softened unsalted butter, packed light brown sugar, and granulated sugar until light and fluffy. Using room temperature butter is crucial here; it incorporates better and creates a smoother texture. Beat in the two large eggs, one at a time, making sure each egg is fully incorporated before adding the next. Then, stir in the vanilla extract. Gradually add the dry ingredients to the wet ingredients, mixing until just combined. Don’t overmix at this stage, as it can lead to tough bars. Finally, fold in the uncooked quick cook oats. The oats will give our crust that wonderfully chewy texture we all love in oatmeal baked goods. You should have a thick, crum extractbly dough. Press about two-thirds of this oatmeal mixture evenly into the bottom of an 8×8 inch baking pan that has been lined with parchment paper, leaving an overhang on the sides to help lift the bars out later. Make sure the crust is pressed down firmly and evenly to create a solid base for our cheesecake layer. Reserve the remaining oatmeal mixture for the topping.
Creating the Cheesecake Layer
Now for the star of the show – the creamy cheesecake filling! In a separate bowl, beat the softened cream cheese until it’s completely smooth and lump-free. This is important for a silky-smooth texture. Add the 1/2 cup of sugar and beat until well combined and creamy. Then, add one egg yolk (from the divided egg) and beat until just incorporated. If you add the egg yolk and the white at the same time, you might risk scrambling the egg in the thicker cream cheese mixture. We’ll use the egg white later. Stir in 1 teaspoon of the vanilla extract into the cream cheese mixture. This cheesecake layer should be rich, decadent, and incredibly smooth.
Assembling and Baking the Bars
Carefully spread the cheesecake mixture evenly over the prepared oatmeal crust in the baking pan. Try to get it as smooth as possible, reaching all the corners. Now, gently sprinkle the reserved oatmeal mixture over the top of the cheesecake layer. Don’t press it down too hard; you want it to create a lovely crum extractble topping. Next, scatter the white chocolate chips and the chopped strawberries over the crum extractb topping. The white chocolate will melt into delightful pockets of sweetness, and the strawberries will add a beautiful pop of color and a burst of fruity flavor. In a small bowl, lightly whisk the remaining egg white until it’s just frothy. You can brush this lightly over the exposed strawberry pieces and white chocolate chips. This helps them to adhere and get a nice golden finish. Bake in a preheated oven at 350°F (175°C) for 30-35 minutes, or until the edges are golden brown and the center is set but still slightly jiggly. You don’t want to overbake them, or they can become dry.
Cooling and Chilling for Perfect Texture
Once baked, remove the pan from the oven and let the bars cool completely in the pan on a wire rack. This is a crucial step! Rushing the cooling process can result in crum extractbly or mushy bars. Once they’ve cooled to room temperature, cover the pan loosely with plastic wrap and transfer it to the refrigerator. Chill for at least 2-3 hours, or preferably overnight. This chilling time is essential for the cheesecake layer to fully set and for the flavors to meld together. It’s what gives you those clean, beautiful slices when you cut into them.
Serving Your Delicious Creation
After the chilling period, use the parchment paper overhang to lift the entire block of bars out of the pan. Place it on a cutting board and slice into squares using a sharp knife. For the cleanest cuts, you can wipe the knife clean between each slice. These Berry Oatmeal Cheesecake Bars are best served chilled. They are a delightful combination of textures and flavors that will impress everyone. Enjoy!
Conclusion:
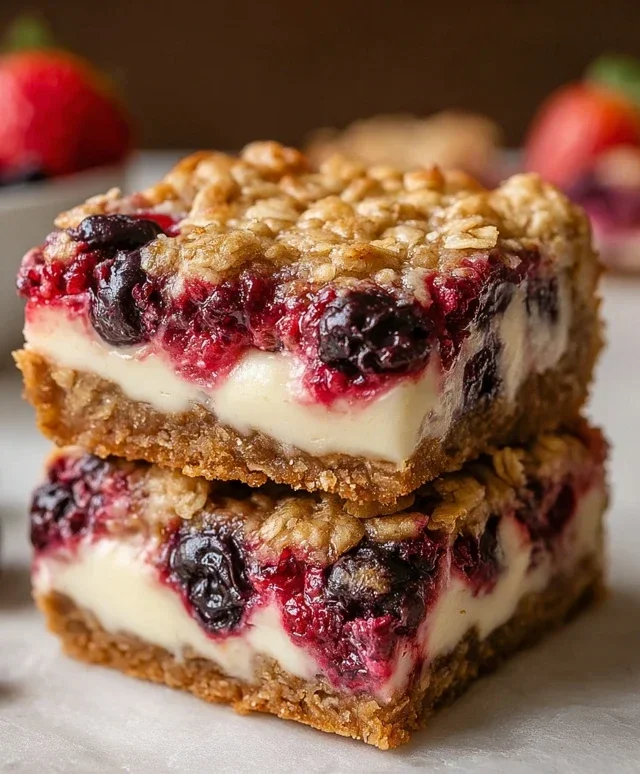
There you have it – a truly delicious and surprisingly simple recipe for Berry Oatmeal Cheesecake Bars! These bars are a fantastic treat because they perfectly balance the creamy tang of cheesecake with the wholesome goodness of oats and the bright burst of fresh berries. They’re ideal for breakfast, a satisfying snack, or even a lighter dessert. The buttery oat crust provides a delightful contrast to the smooth, rich cheesecake filling, and the berries add a beautiful pop of color and flavor that makes them irresistible. I genuinely encourage you to give these Berry Oatmeal Cheesecake Bars a try; I’m confident you’ll love them as much as I do!
For serving, I love them slightly chilled, but they are also wonderful at room temperature. They pair beautifully with a cup of coffee or a glass of milk. If you’re feeling adventurous with variations, consider adding a sprinkle of cinnamon to the oat crust, or swapping out the berries for chopped stone fruit like peaches or cherries during peak season. A drizzle of honey or a dollop of whipped cream takes them to the next level!
Frequently Asked Questions:
Can I use frozen berries instead of fresh?
Absolutely! If you’re using frozen berries, it’s best to toss them with a tablespoon of cornstarch before adding them to the cheesecake mixture. This helps absorb some of the excess moisture as they thaw during baking, preventing a watery filling. You can also thaw them slightly beforehand, but avoid draining too much liquid.
How long do these bars keep in the refrigerator?
These Berry Oatmeal Cheesecake Bars store wonderfully in an airtight container in the refrigerator for up to 4-5 days. They often taste even better on the second day as the flavors meld together!
Can I make this recipe gluten-free?
Yes, you can easily adapt this recipe to be gluten-free! Simply substitute the rolled oats in the crust with certified gluten-free rolled oats or a gluten-free oat flour blend. You might need to adjust the liquid slightly depending on the gluten-free flour used, but in most cases, it’s a straightforward swap.
Berry Oatmeal Cheesecake Bars
Delicious bars with a buttery oat crust, creamy cheesecake filling, and sweet berries. Perfect for a treat!
Ingredients
-
1 3/4 cups (228g) all-purpose flour
-
1 tsp baking soda
-
3/4 tsp ground cinnamon
-
1/2 tsp salt
-
3/4 cup (168g) unsalted butter, room temperature
-
3/4 cup (168g) packed light brown sugar
-
1/2 cup (104g) sugar
-
2 large eggs
-
2 tsp vanilla extract
-
2 cups (175g) uncooked quick cook oats
-
8 oz cream cheese
-
1/2 cup (104g) sugar
-
1 large egg, divided
-
3/4 cup (127g) white chocolate chips
-
1 1/4 cups chopped strawberries
Instructions
-
Step 1
Preheat oven to 350°F (175°C). Line a 9×13 inch baking pan with parchment paper. -
Step 2
In a large bowl, whisk together flour, baking soda, cinnamon, and salt. -
Step 3
In a separate bowl, cream together butter, brown sugar, and 1/2 cup sugar until light and fluffy. Beat in 2 large eggs and vanilla extract. -
Step 4
Add the dry ingredients to the wet ingredients and mix until just combined. Stir in the oats and white chocolate chips. Press 2/3 of the mixture into the bottom of the prepared baking pan to form the crust. -
Step 5
In a medium bowl, beat cream cheese and 1/2 cup sugar until smooth. Beat in the remaining 1 large egg and vanilla extract until combined. -
Step 6
Spread the cream cheese mixture evenly over the oat crust. Sprinkle the remaining oat mixture and the chopped strawberries over the cream cheese layer. -
Step 7
Bake for 30-35 minutes, or until the edges are golden brown and the center is set. -
Step 8
Let cool completely in the pan on a wire rack before cutting into bars.
Important Information
Nutrition Facts (Per Serving)
It is important to consider this information as approximate and not to use it as definitive health advice.
Allergy Information
Please check ingredients for potential allergens and consult a health professional if in doubt.